Trail Talk: Rodney Falls/Hardy Falls/Pool of the Winds

Location: Rodney Falls, Hardy Falls, Pool of the Winds (Hamilton Mountain Trailhead) – Beacon Rock State Park

Difficulty: Easy-Moderate

Distance: 2.5 miles out and back (roughly)

Elevation: 600’

Cost: This park does require a Discovery Pass: $10 for day pass, $30 for annual Washington State Pass

Both of which can be purchased directly on site at a pay station. Day passes can be purchased by cash envelope at the additional parking lot as well.

Parking: There is small paved lot right at the trail head. There is extra paved parking further up the hill in the picnic area. If going on the weekend/holiday get there early to get a spot.
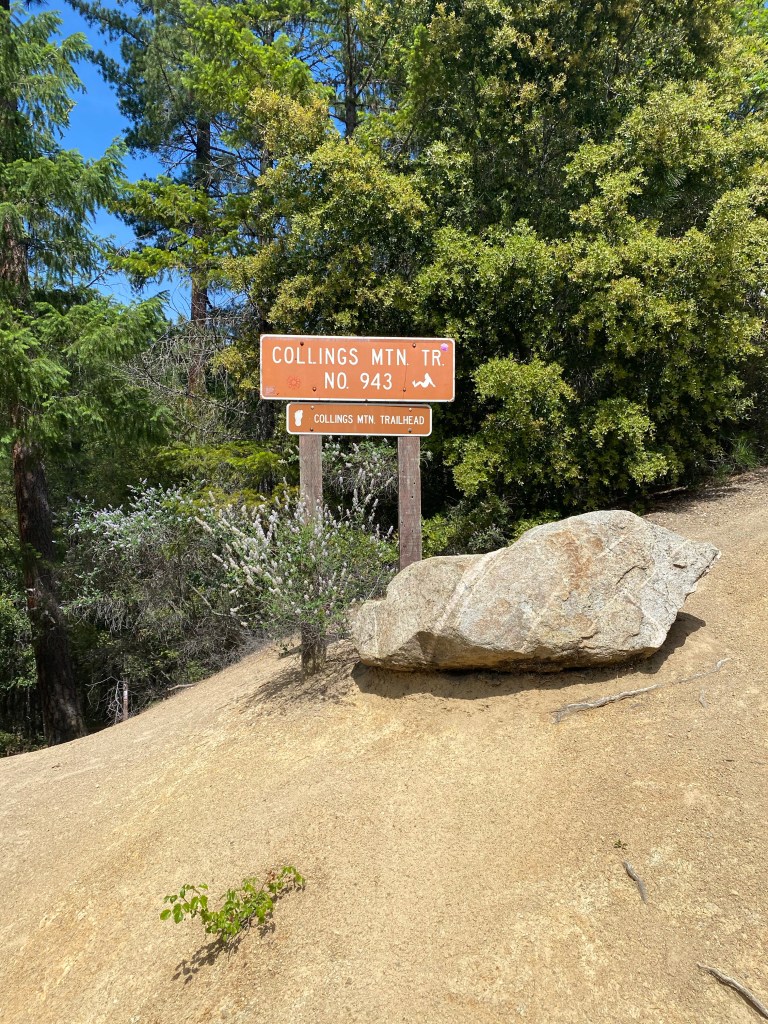
Directions:

From the Washington side, drive Route 14 east (about 18 miles past Washougal). The park will have plenty of signage and be directly off of the highway. There will be parking on both sides for other trail heads, and a road on the left hand side going up. Take the smaller left hand side road up the hill to find the Hamilton Mountain Trail Head. (you can also follow signs for the campground as its past the trail head).

Preparation:

  • Water.
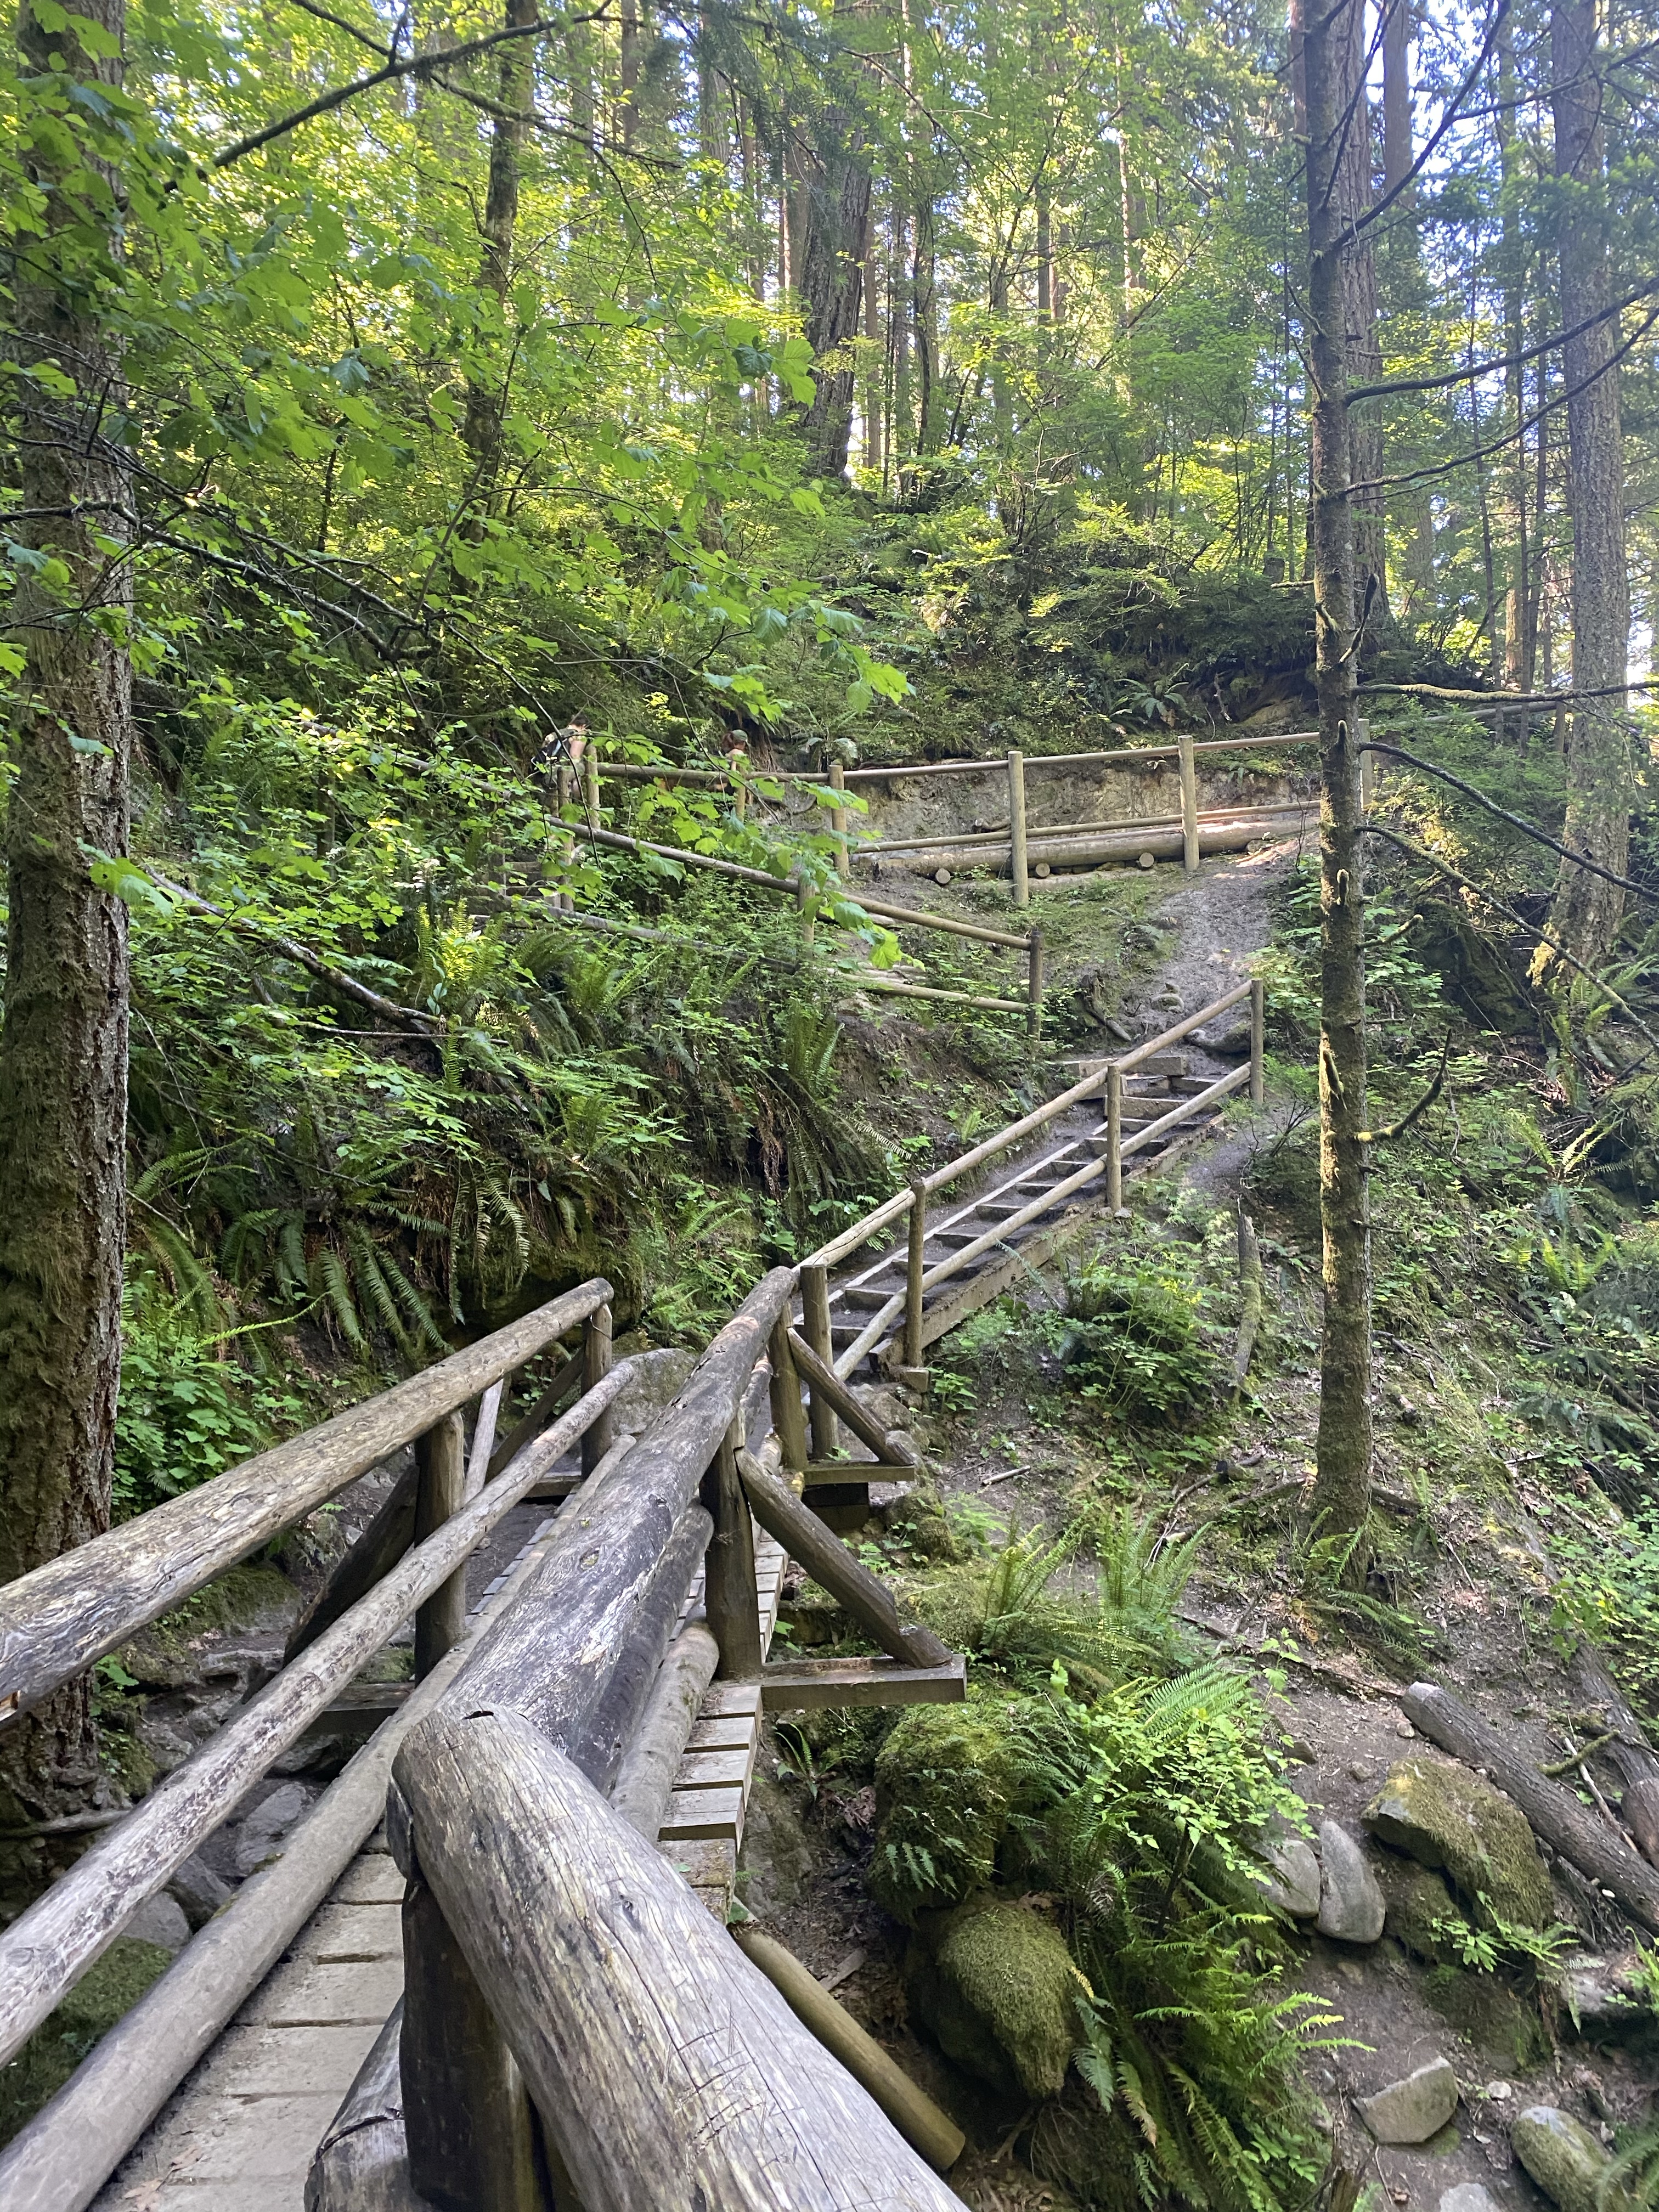
  • Shoes/Clothes. This trail can be muddy if it has just rained so bring shoes with good traction that you are ready to get dirty. There are also several options to climb closer to the water.
  • Sunscreen. Always a great idea!
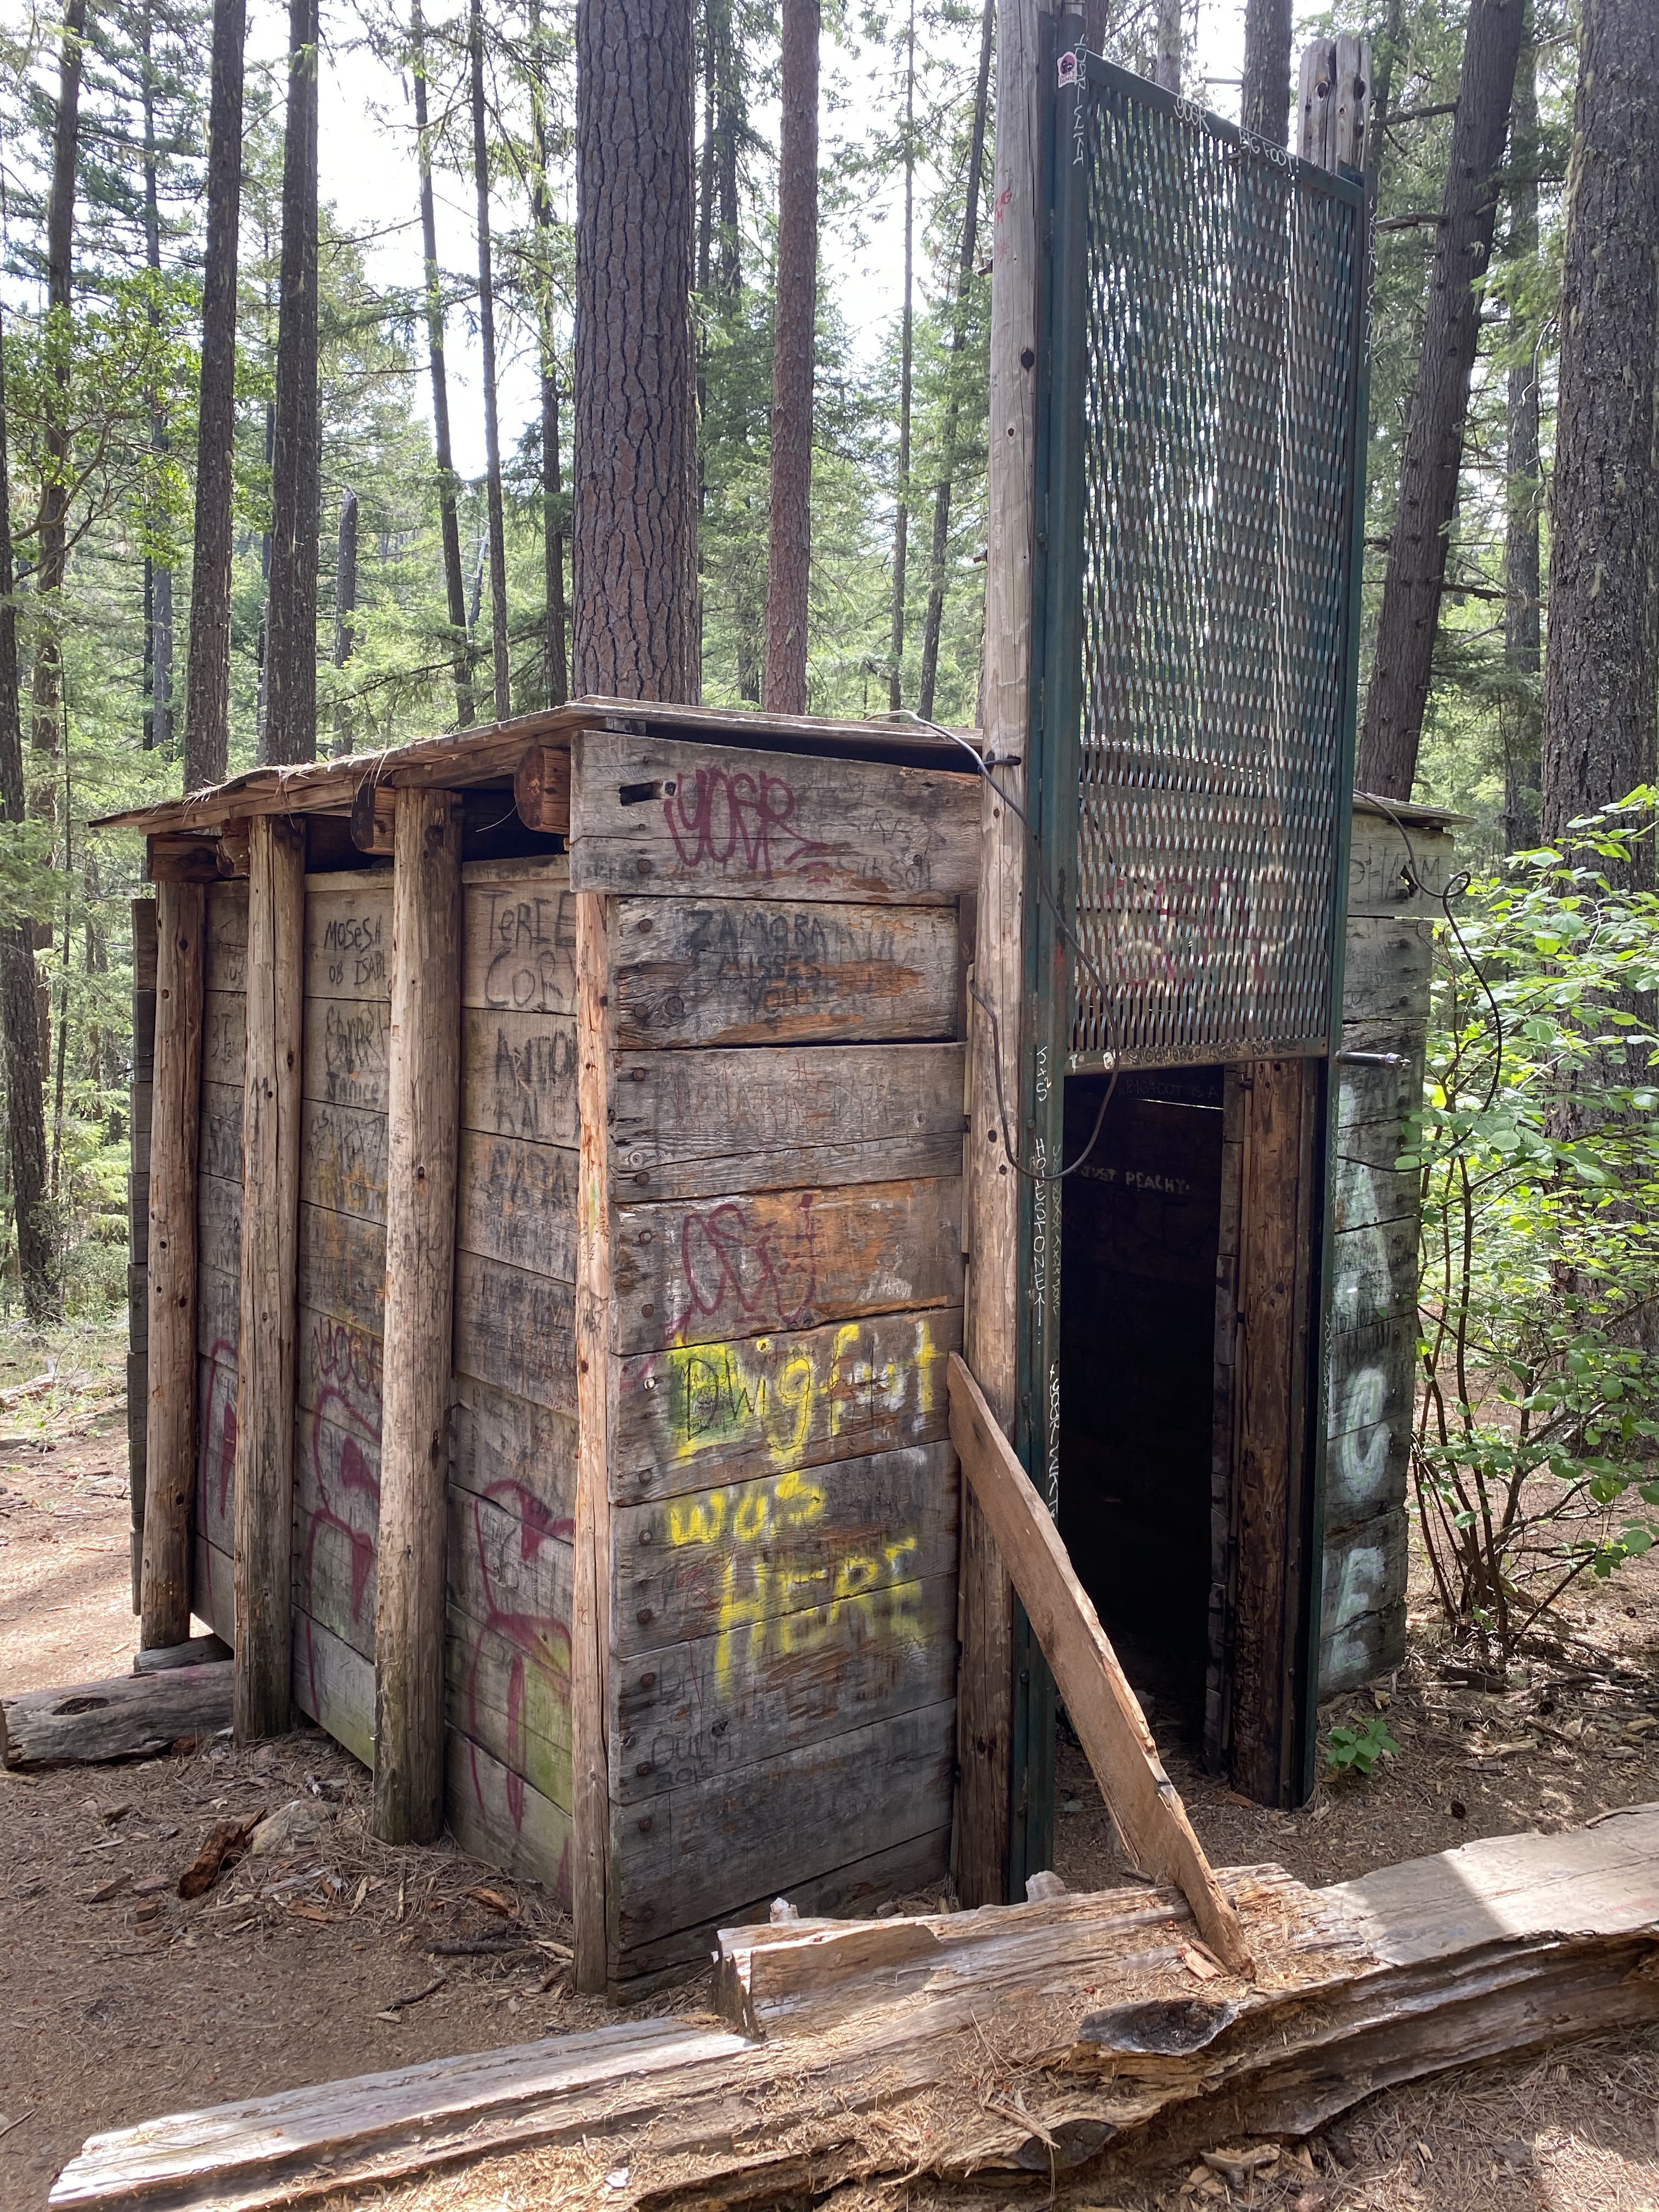
  • Bathroom. There is one located at the trail head as well as another located at the additional parking picnic area. Both are currently open.  
  • Dogs. Allowed on leash.

Experience:

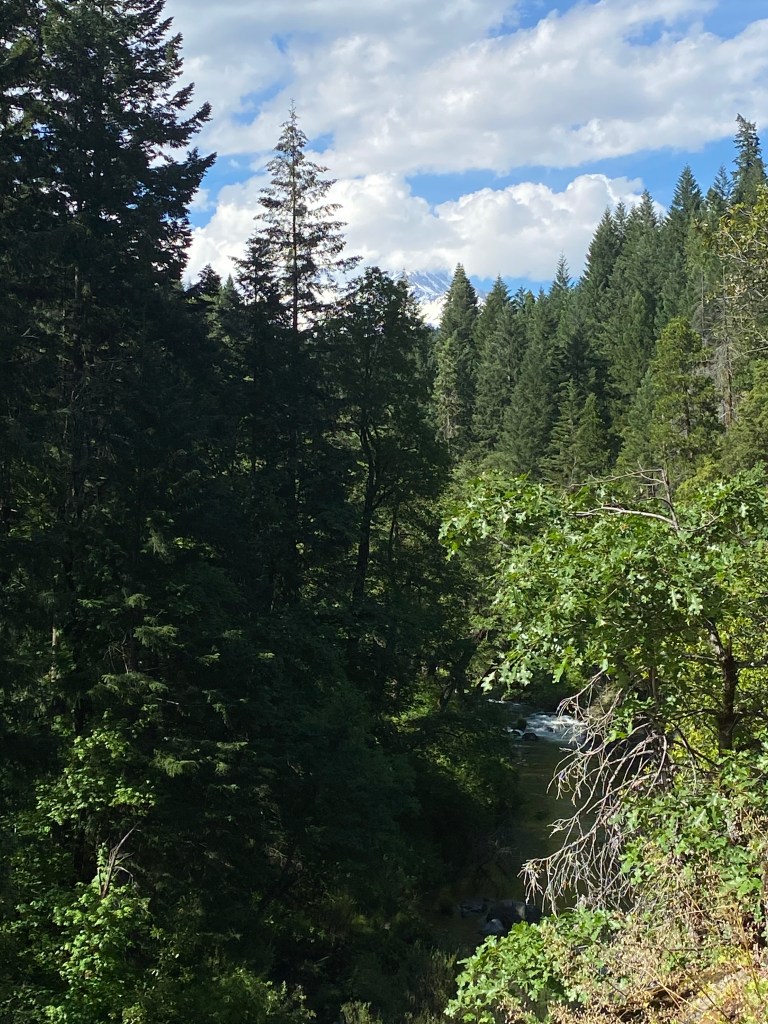
My husband and I did this trail on a holiday Monday (Memorial Day). Thankfully, we planned for it to be busy and pulled into the lot at 8:30 am. We ended up parking at the overflow picnic area lot as the parking directly next to the trailhead was already full. By the time we walked down to pay and brought it back to our car the overflow lot was also full. Surprisingly, the trail did not seem too overwhelmed with people despite the car situation. This was our first hike together since moving to the Pacific Northwest, so we took it easy, and I did not wear my watch to time the distances. The first couple of hikes back into a weekly hiking routine always take way more out of me and I did not want to feel discouraged, ‘slow and steady gets you to the falls’ was my motto!

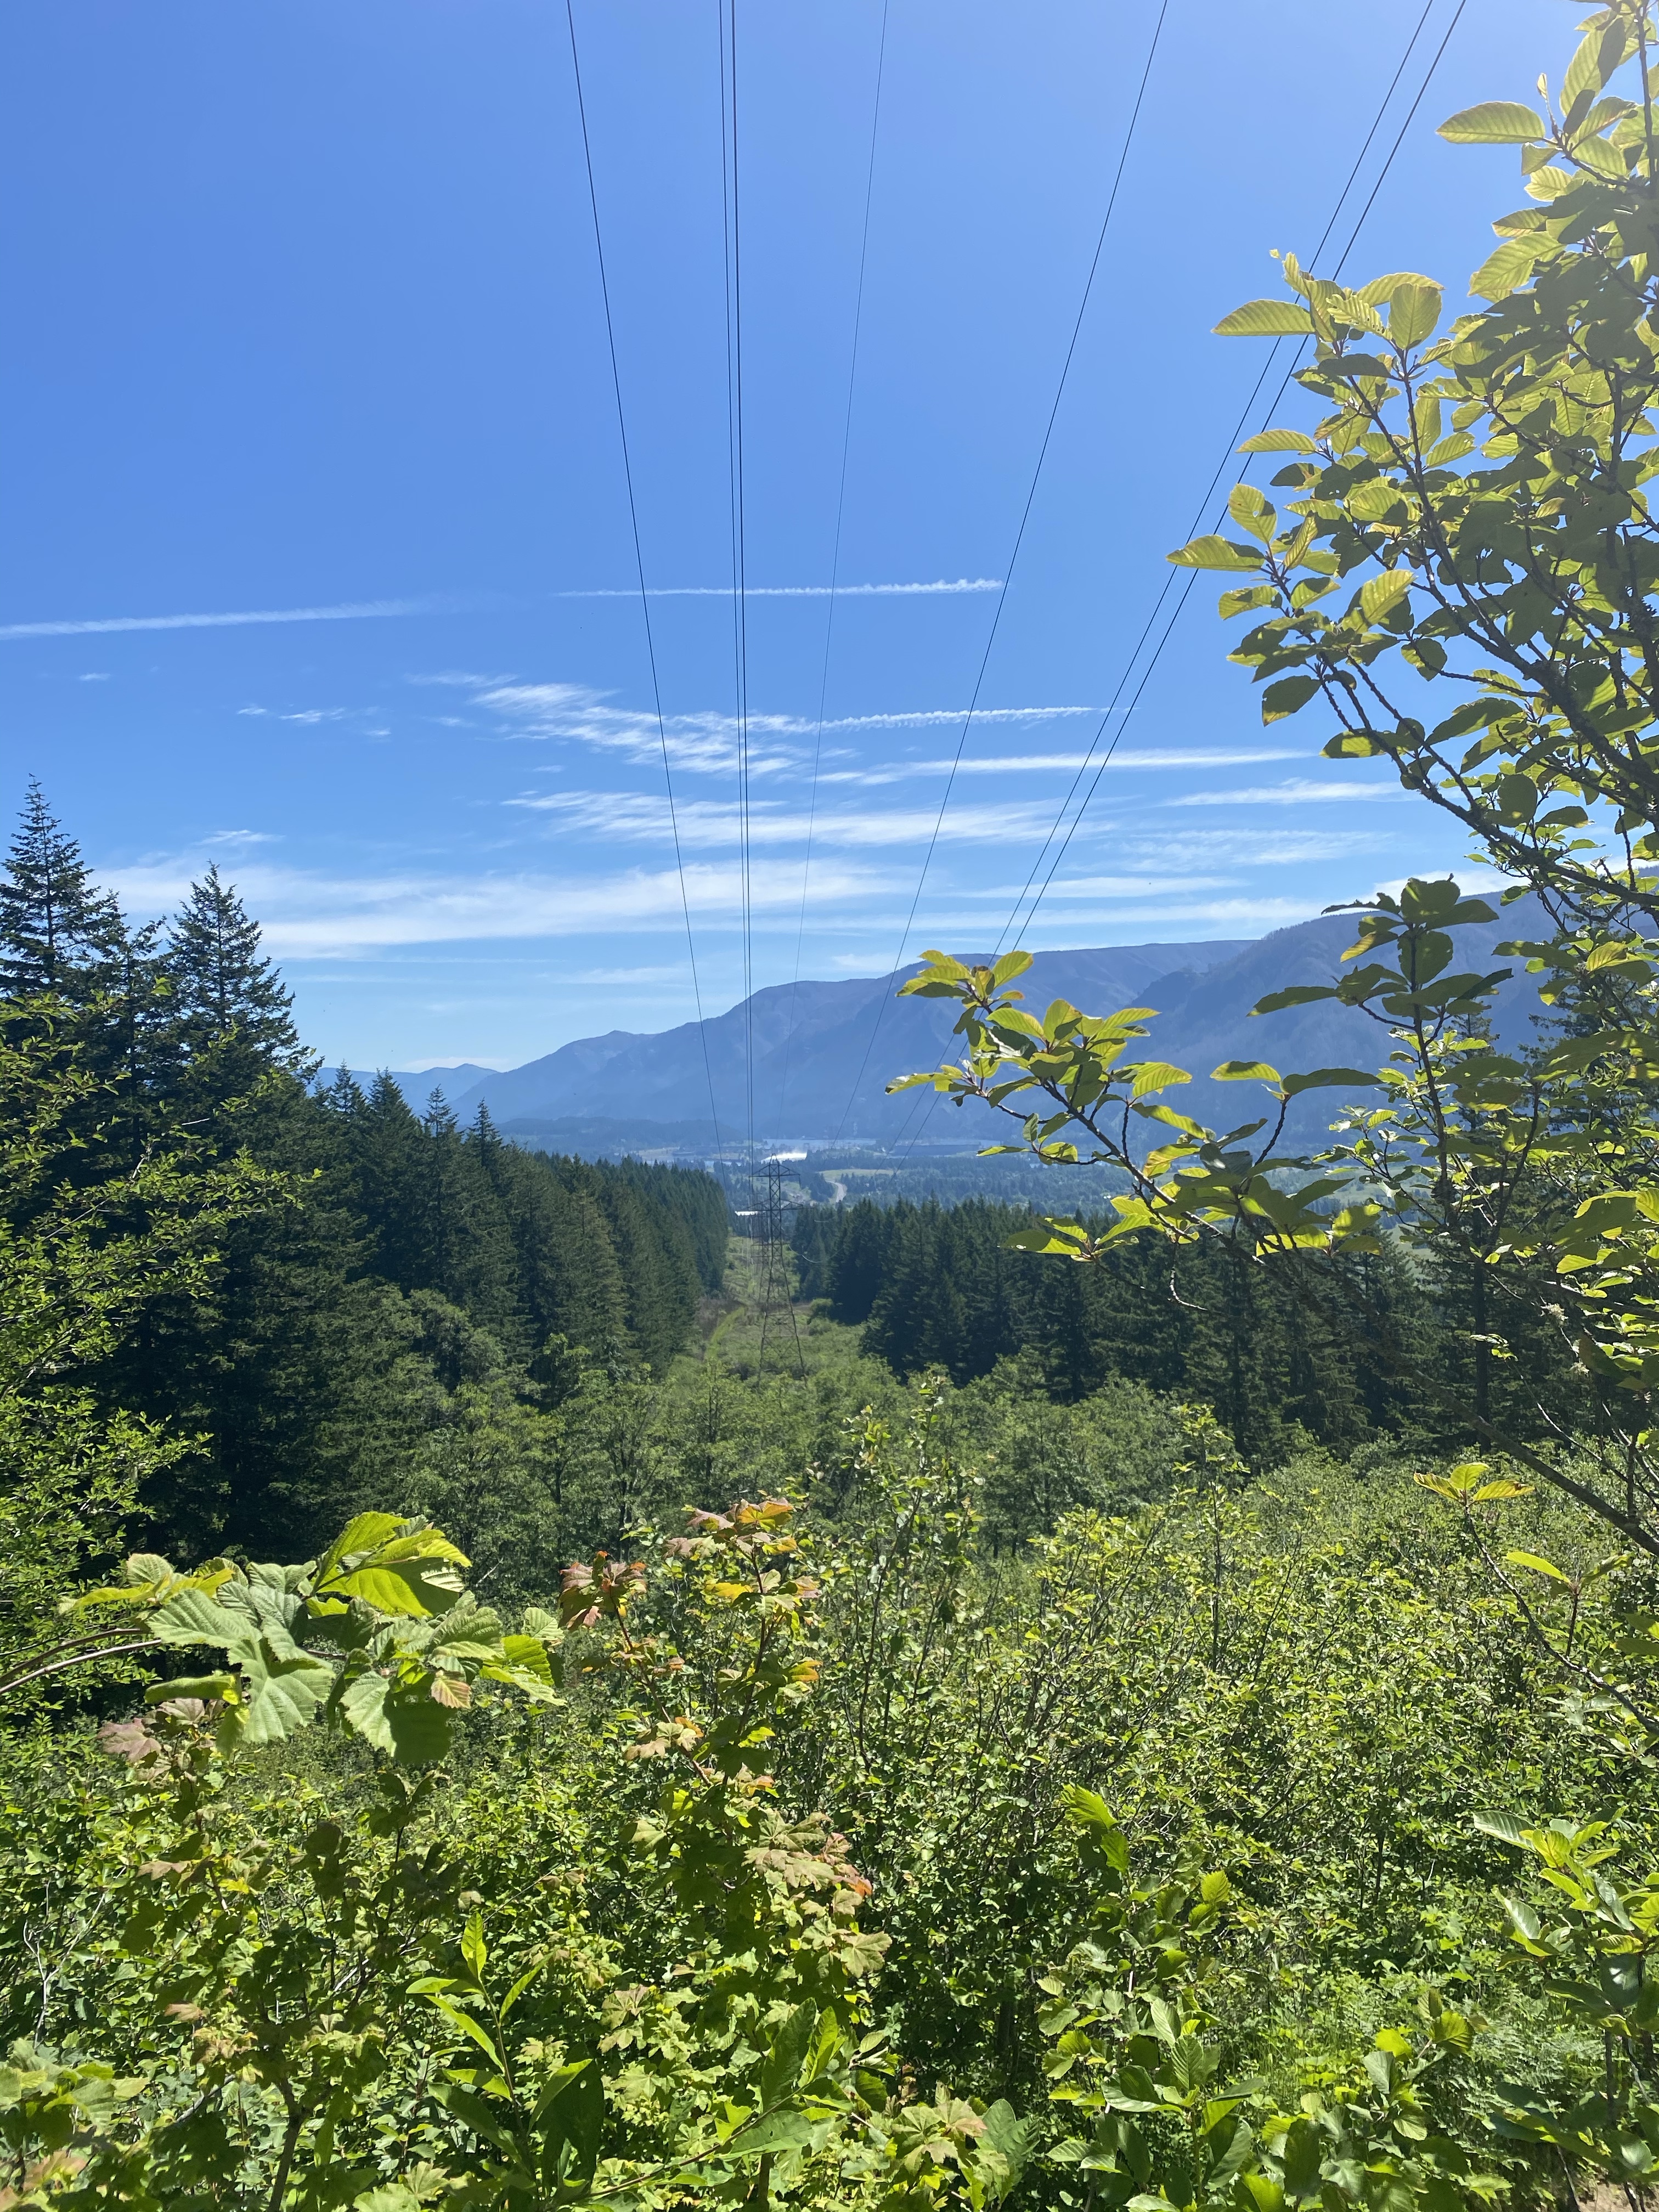
There are two ways to begin this hike if you are starting from the overflow parking. If you turn right at the parking lot entrance and walk downhill back to the main lot you can pick up the beginning of the Hamilton Mountain Trail. You can also turn left and go up through the campground utilizing the Hadley Trail. This will take you through a second growth fir canopy and lead you eventually up under some powerlines to a picnic table with a great view of the Gorge. Eventually, connecting you to the Hamilton Mountain Trail at around .6 miles in (veer to the left to continue to the falls). We used this trail to return to our car and loved it as it was less crowded than following Hamilton Mountain Trail back to the main parking area.

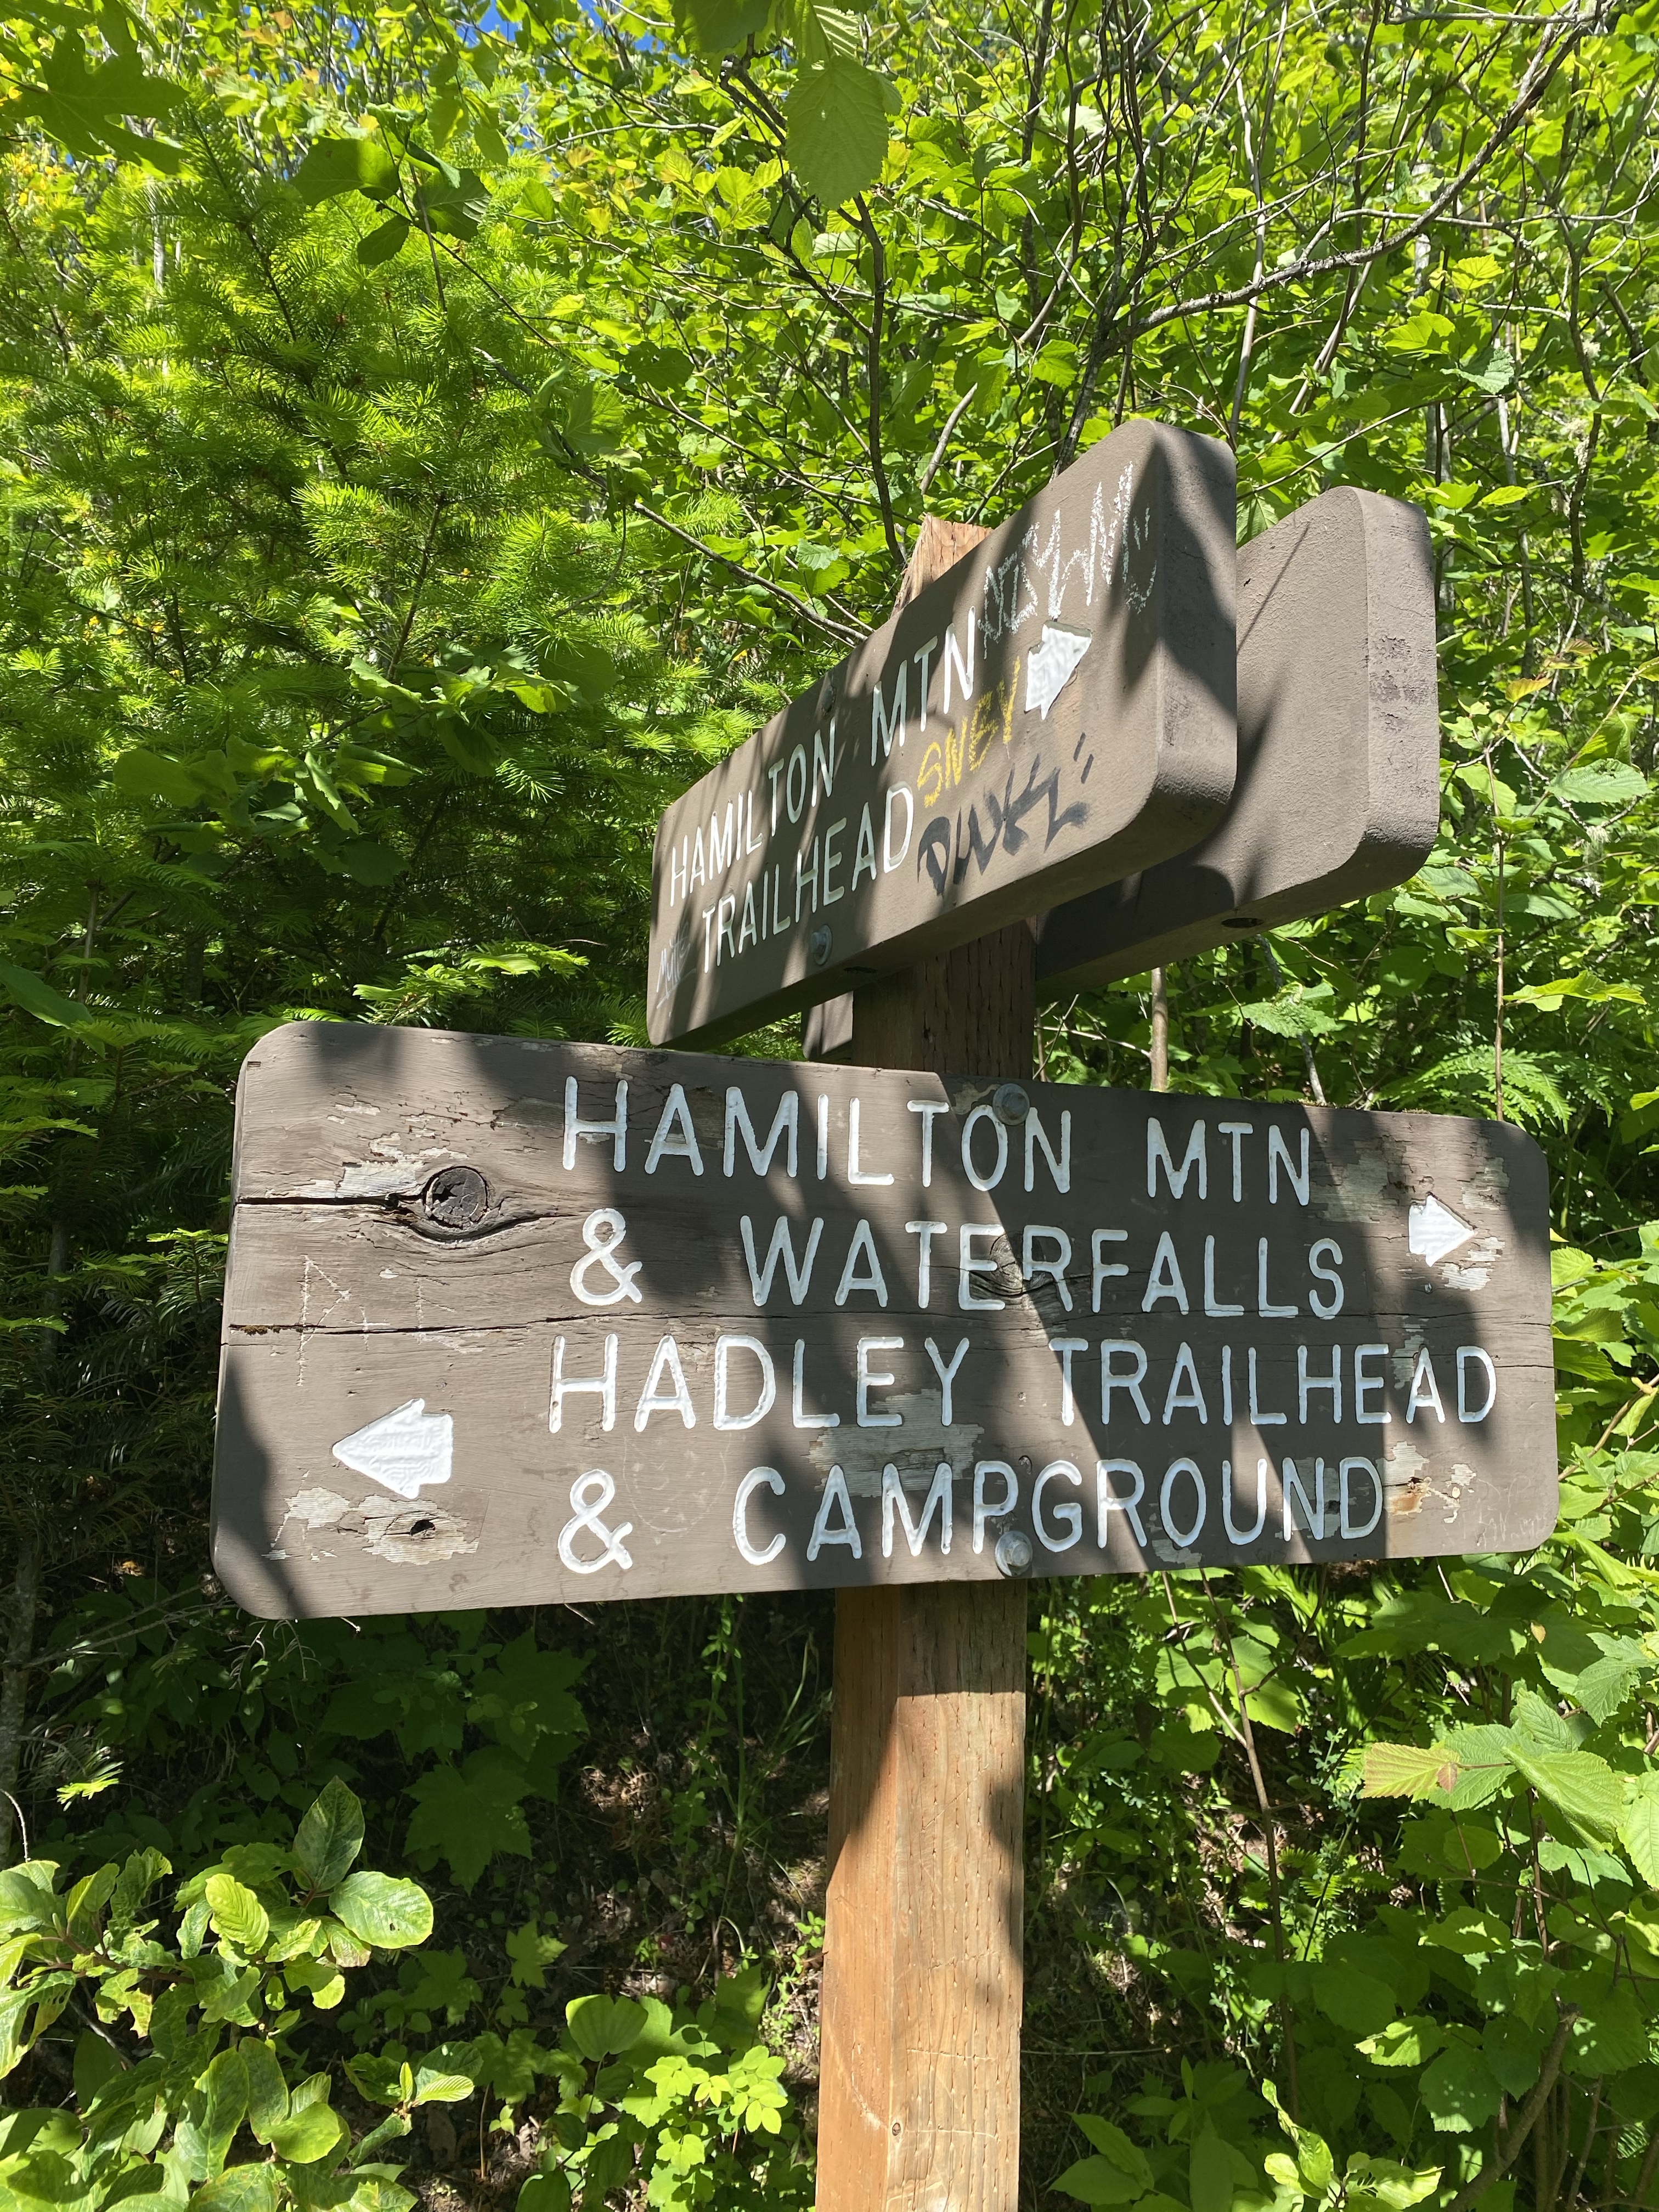
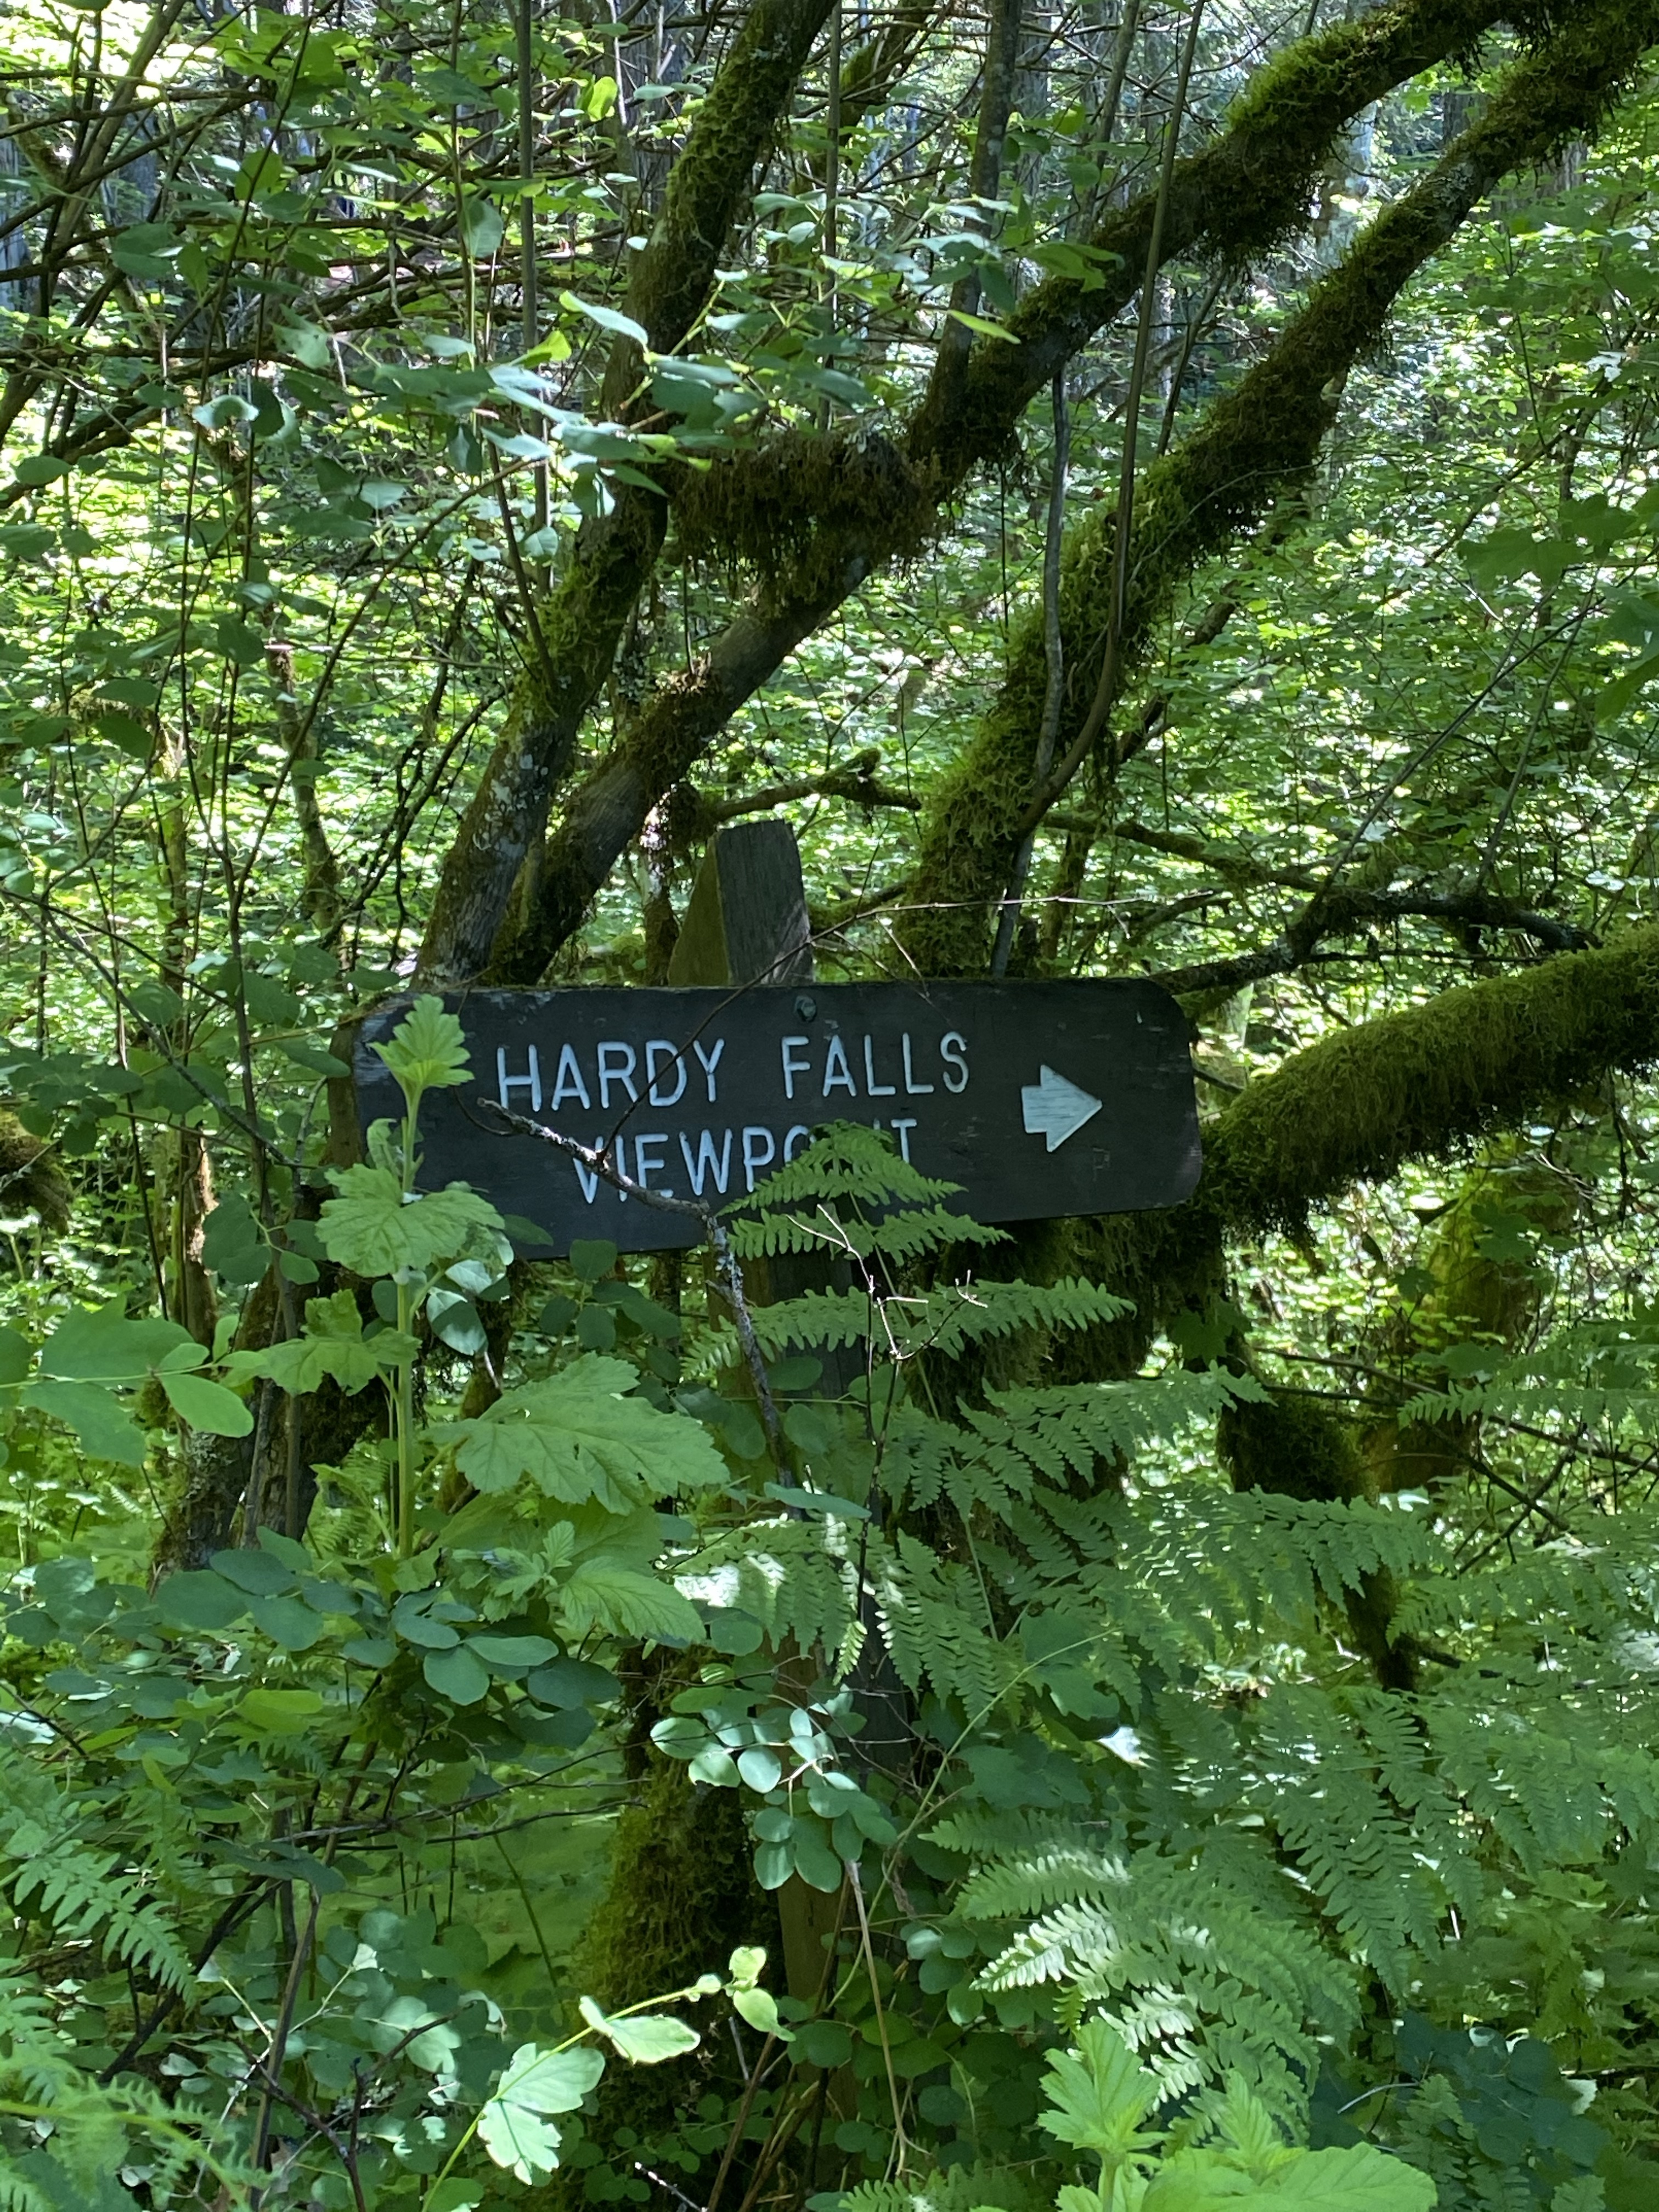
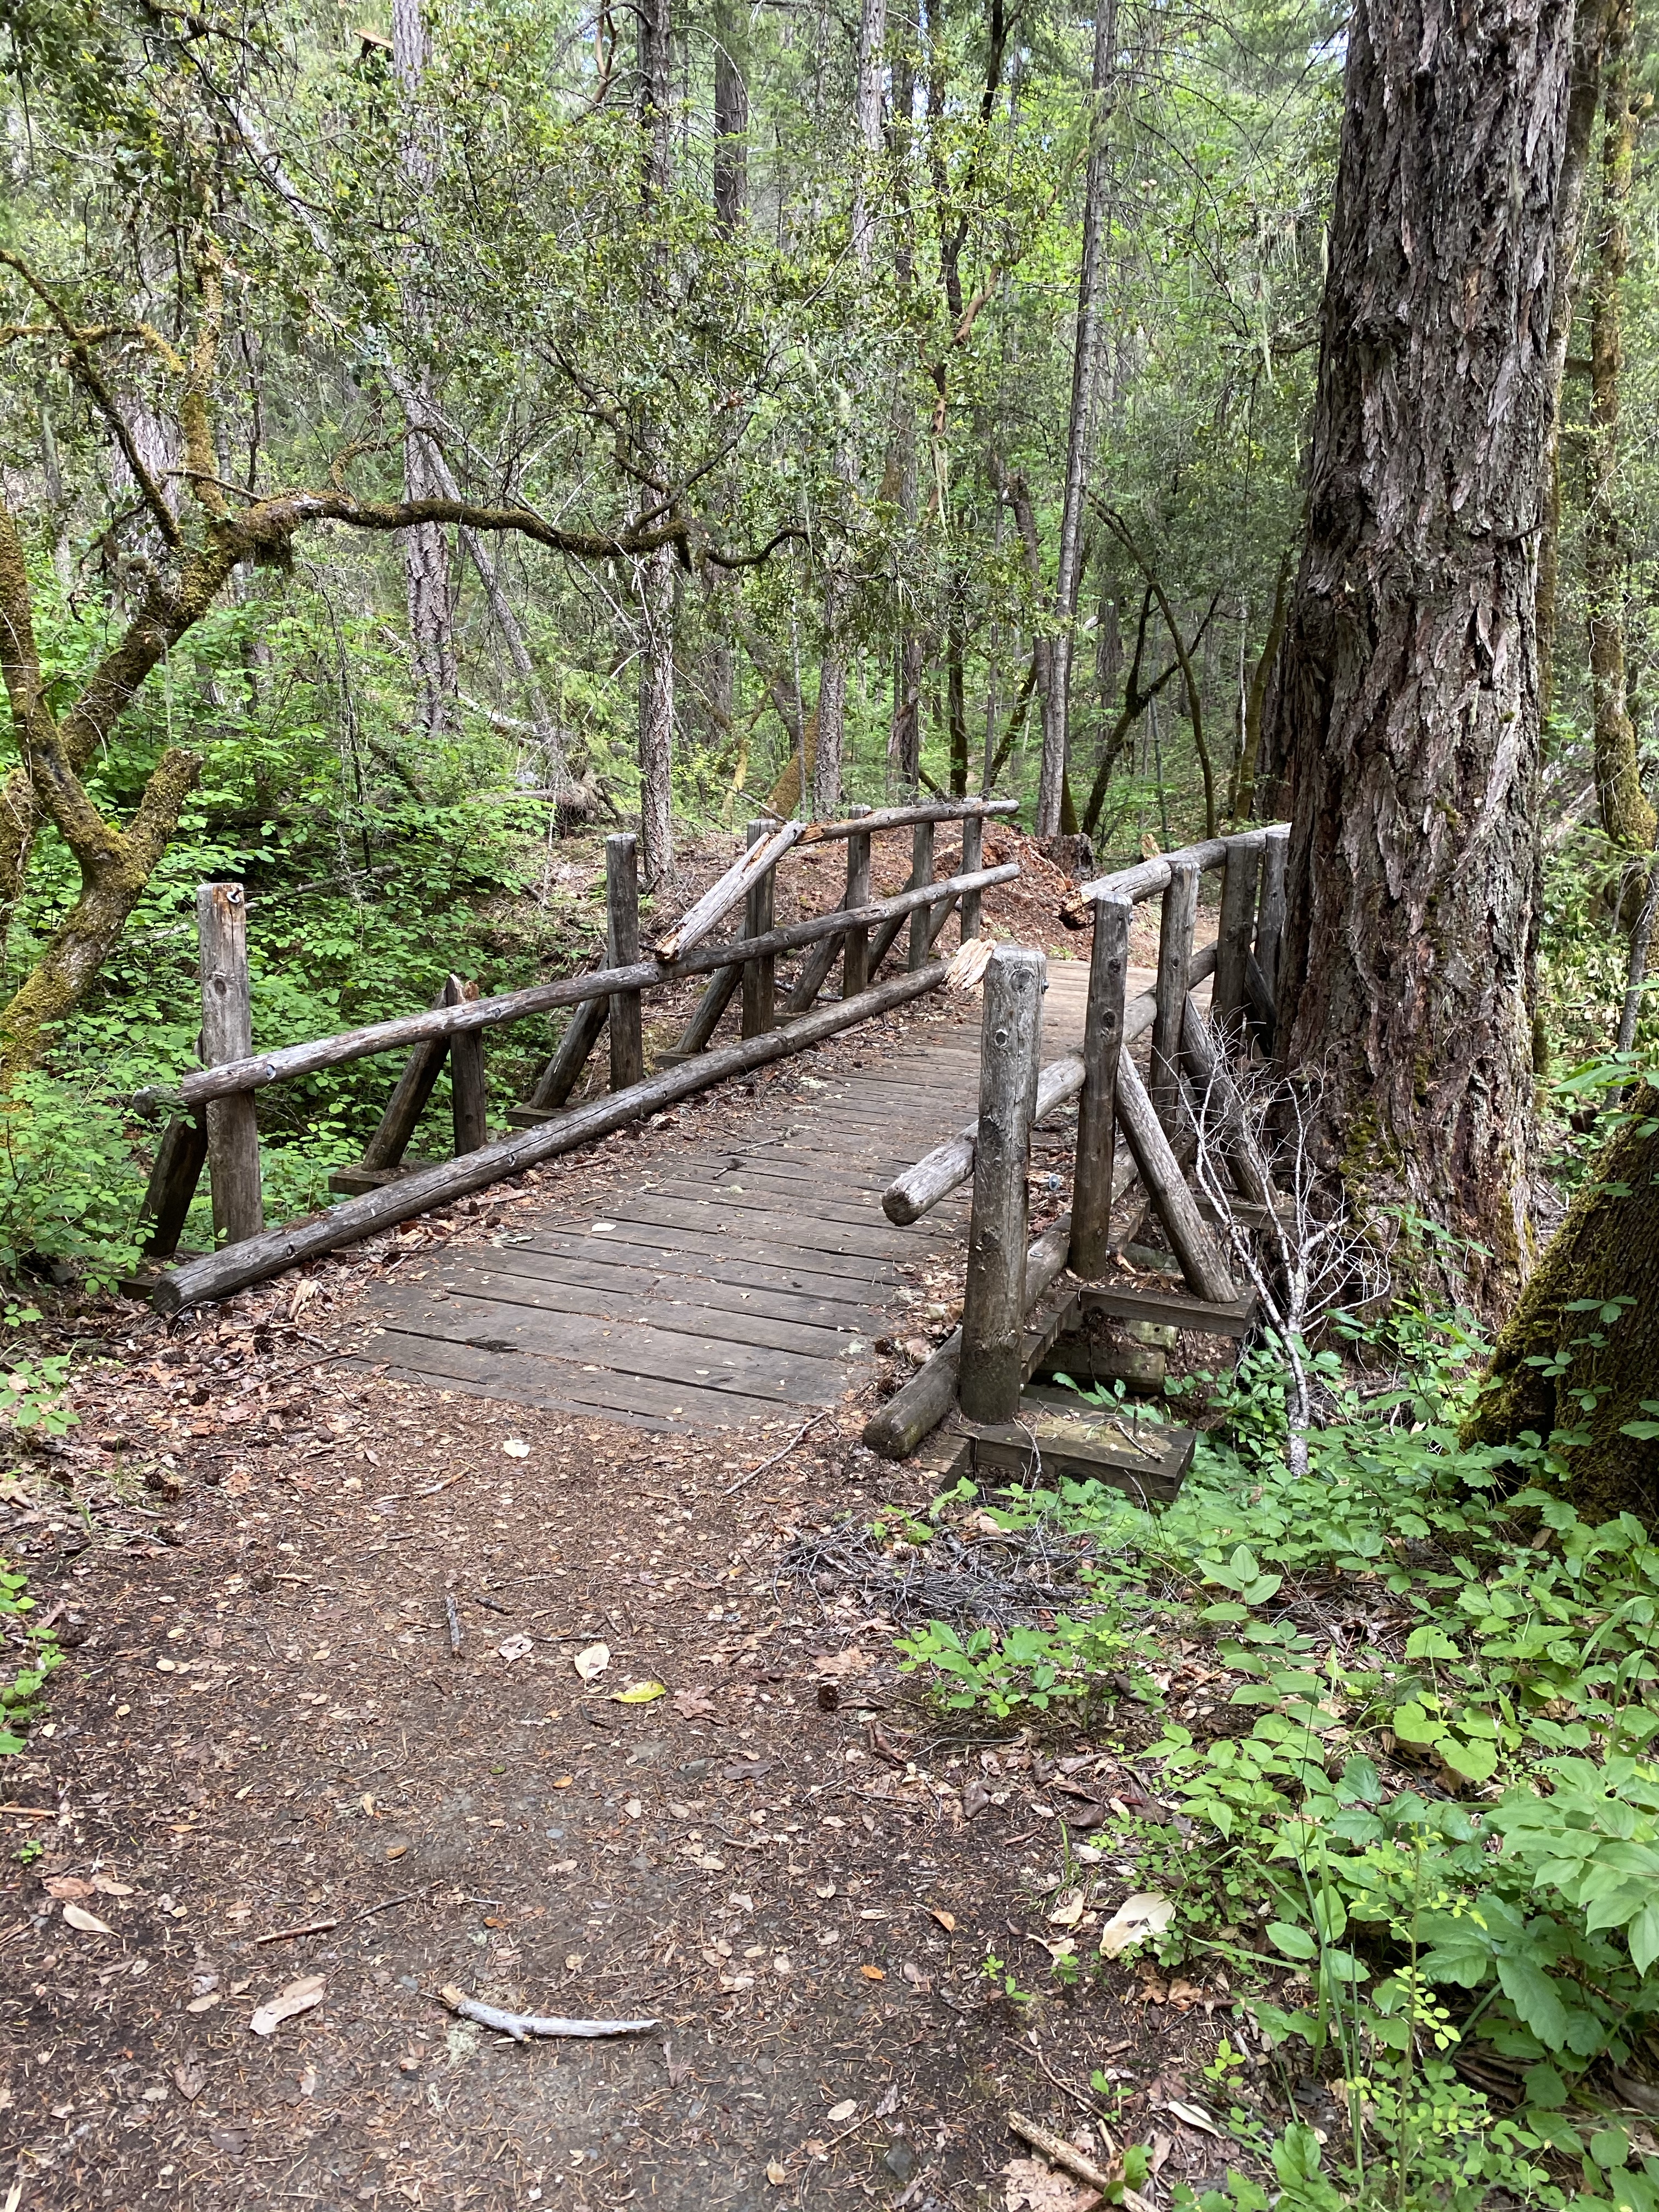
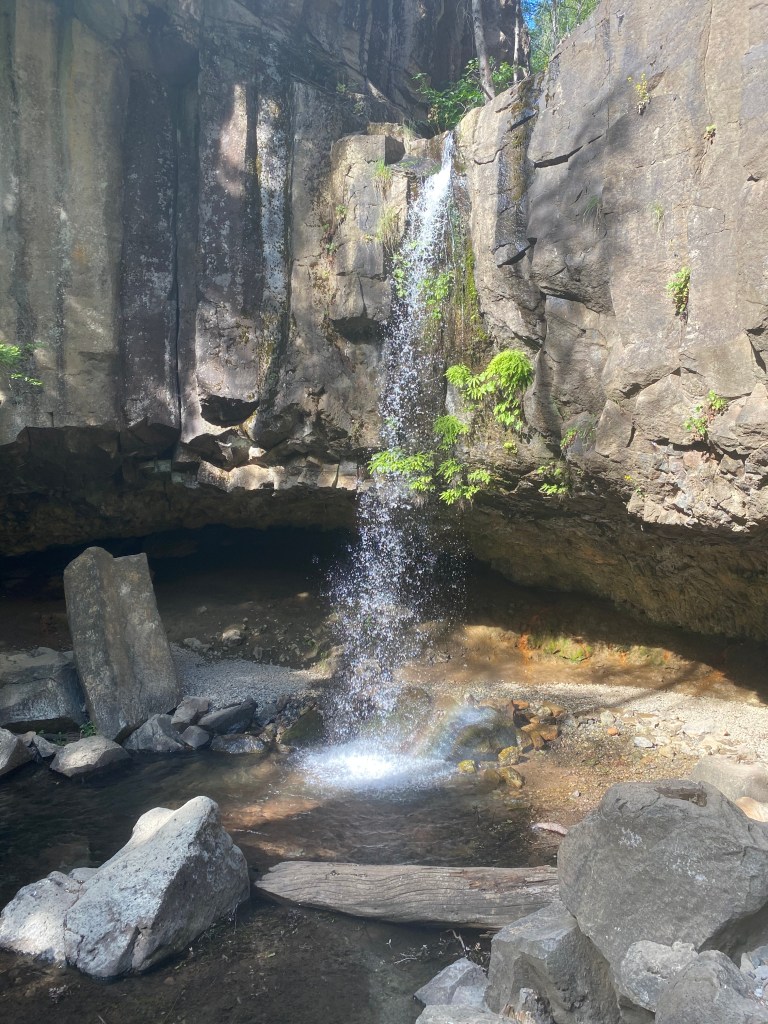
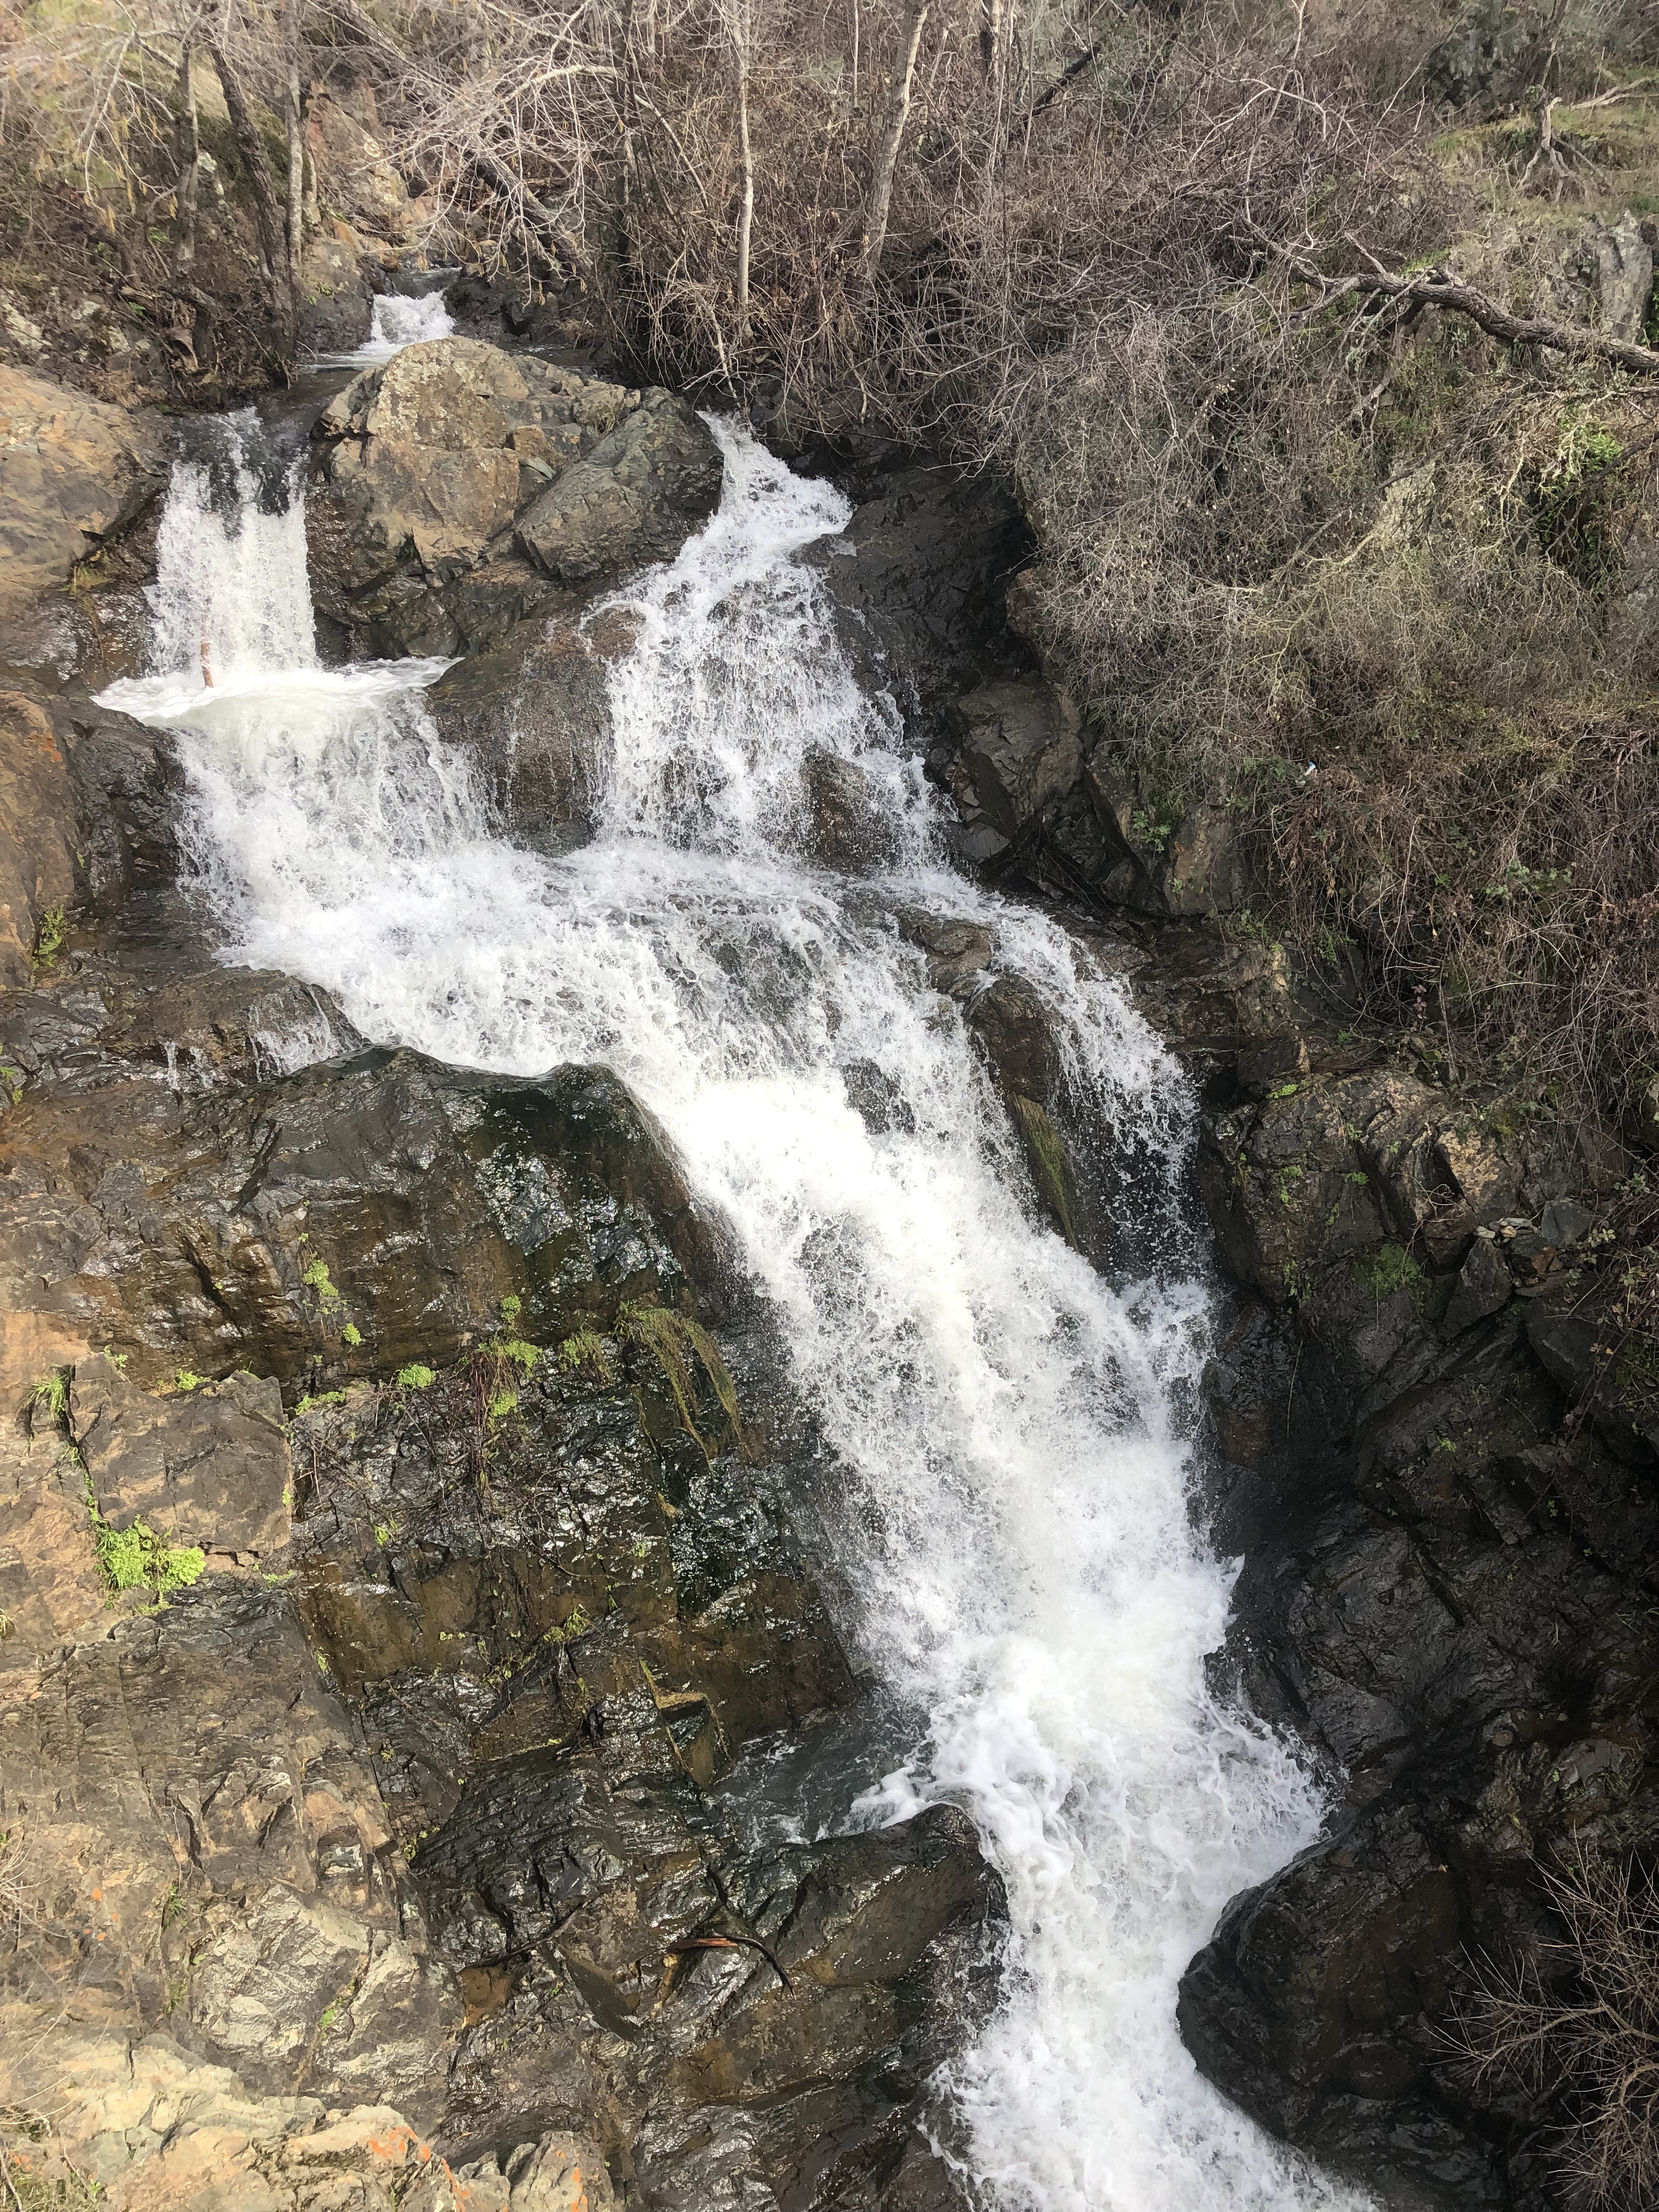
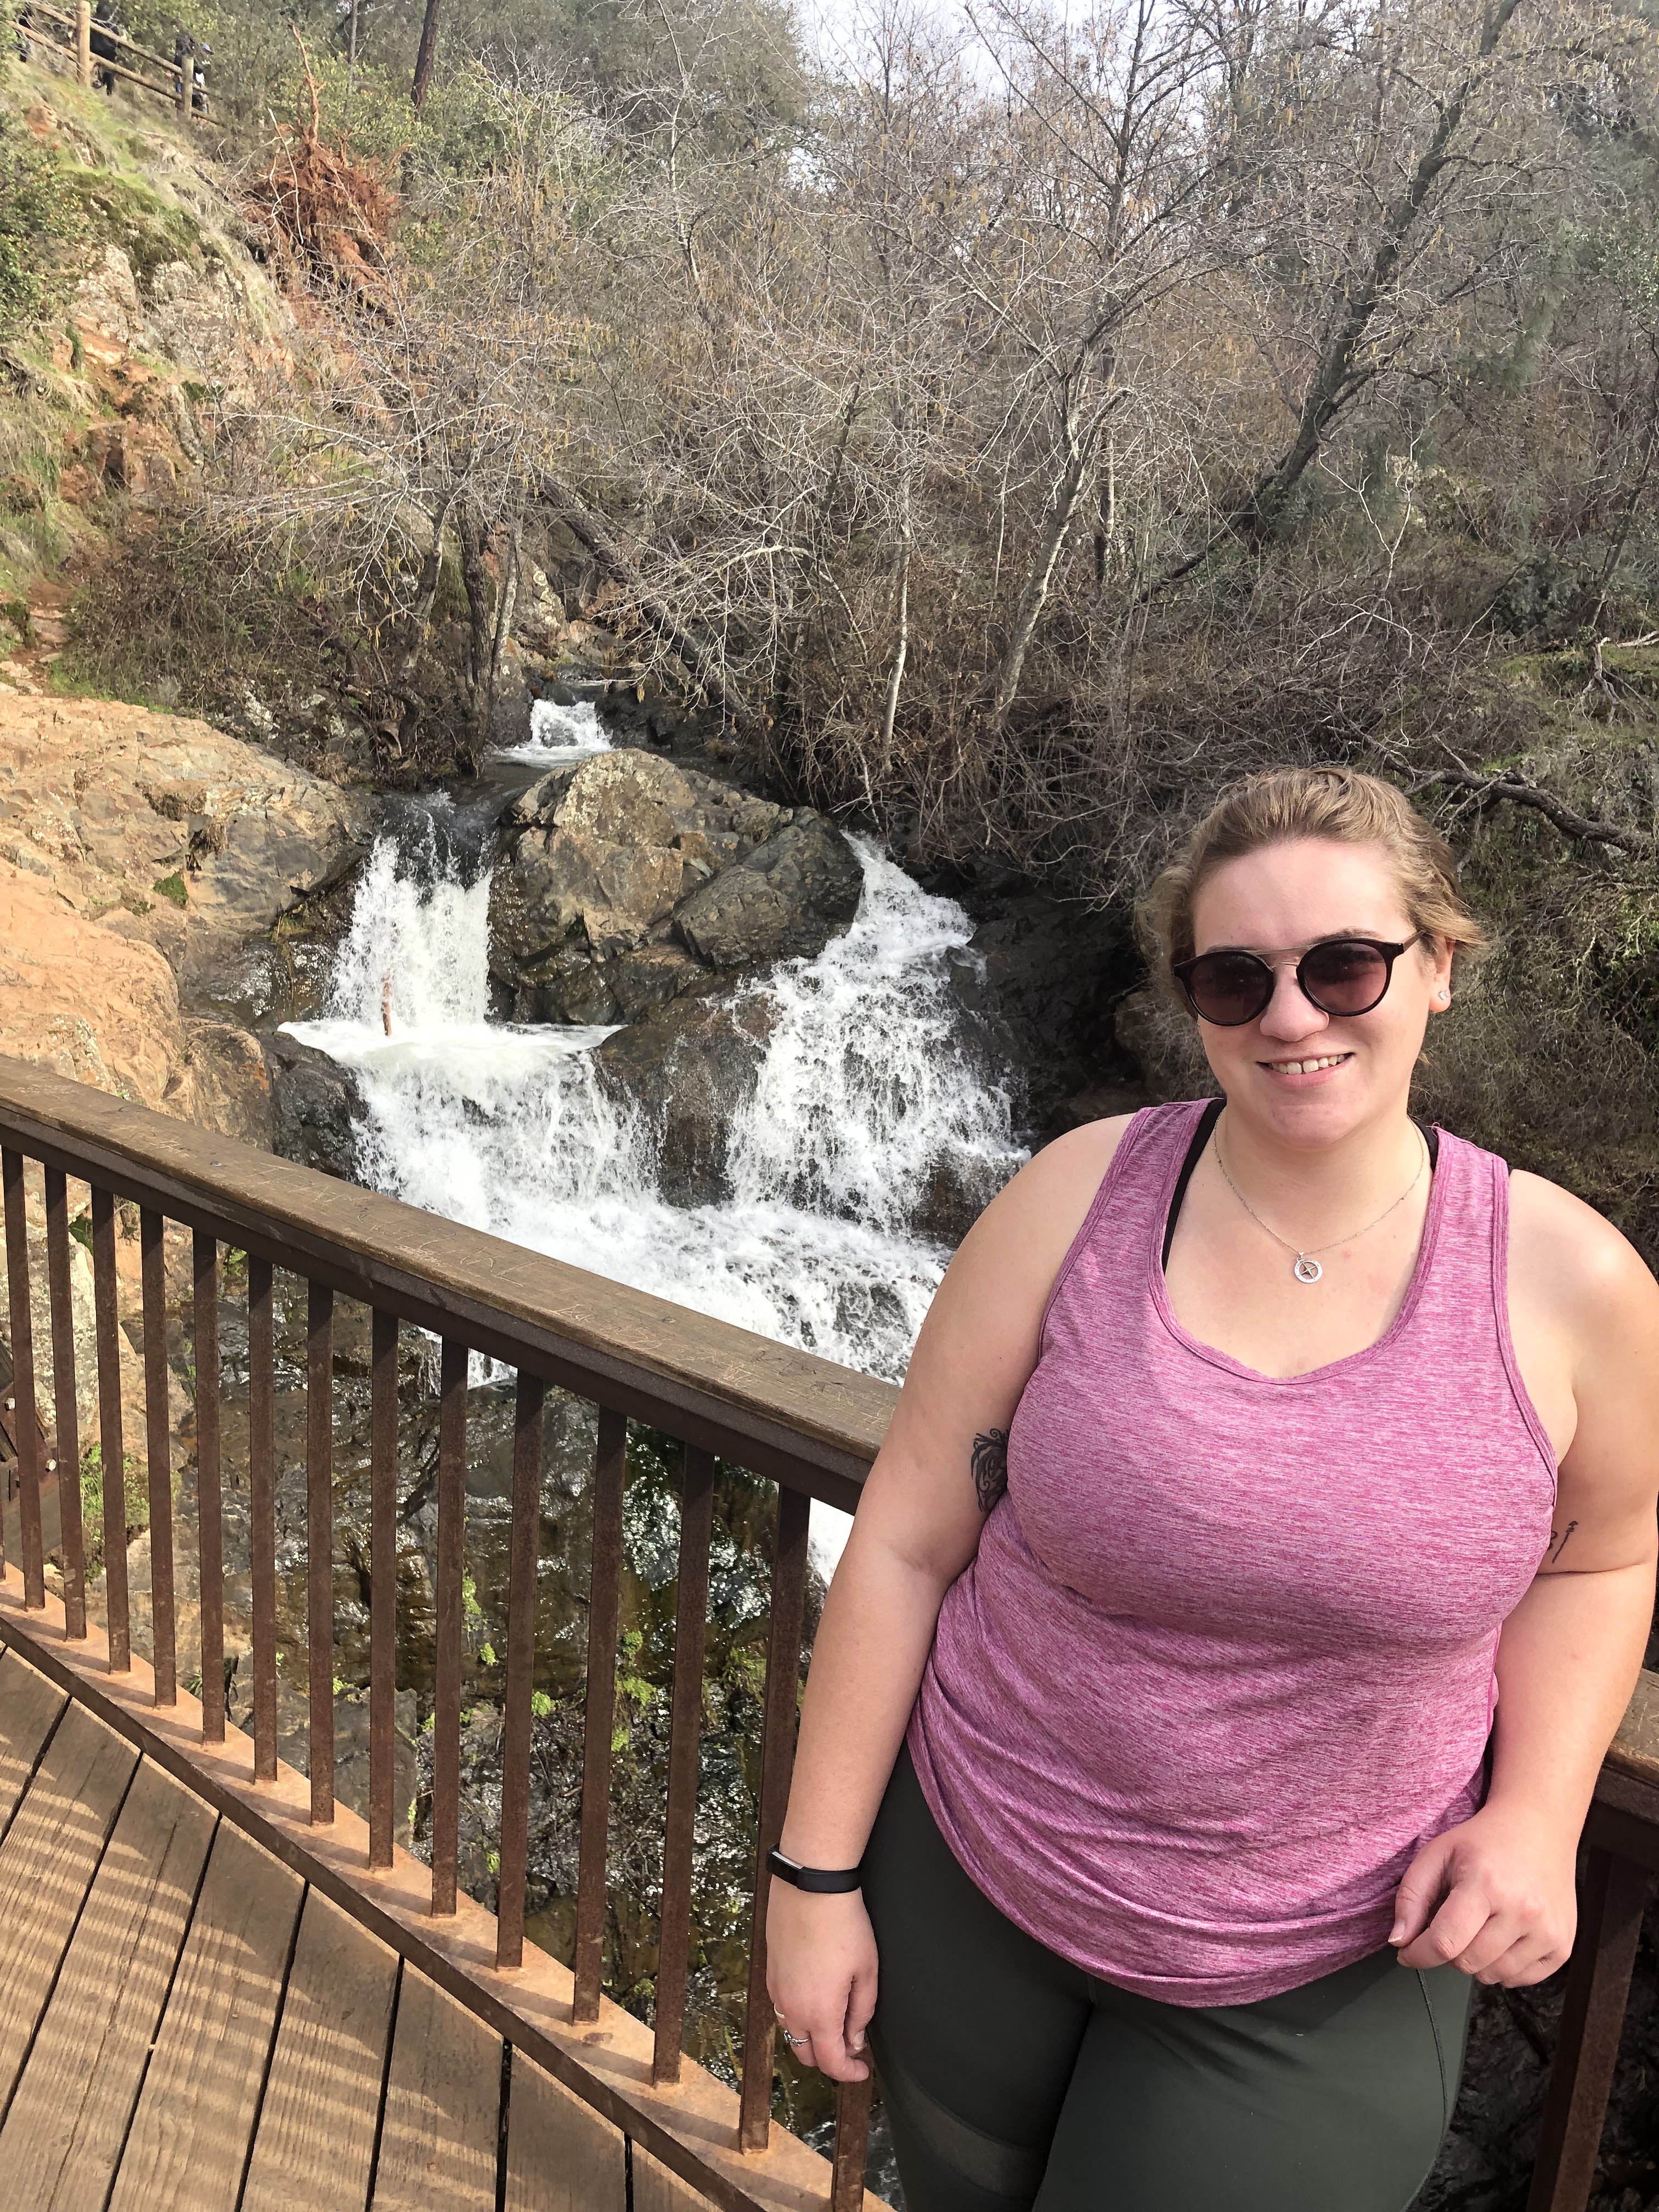
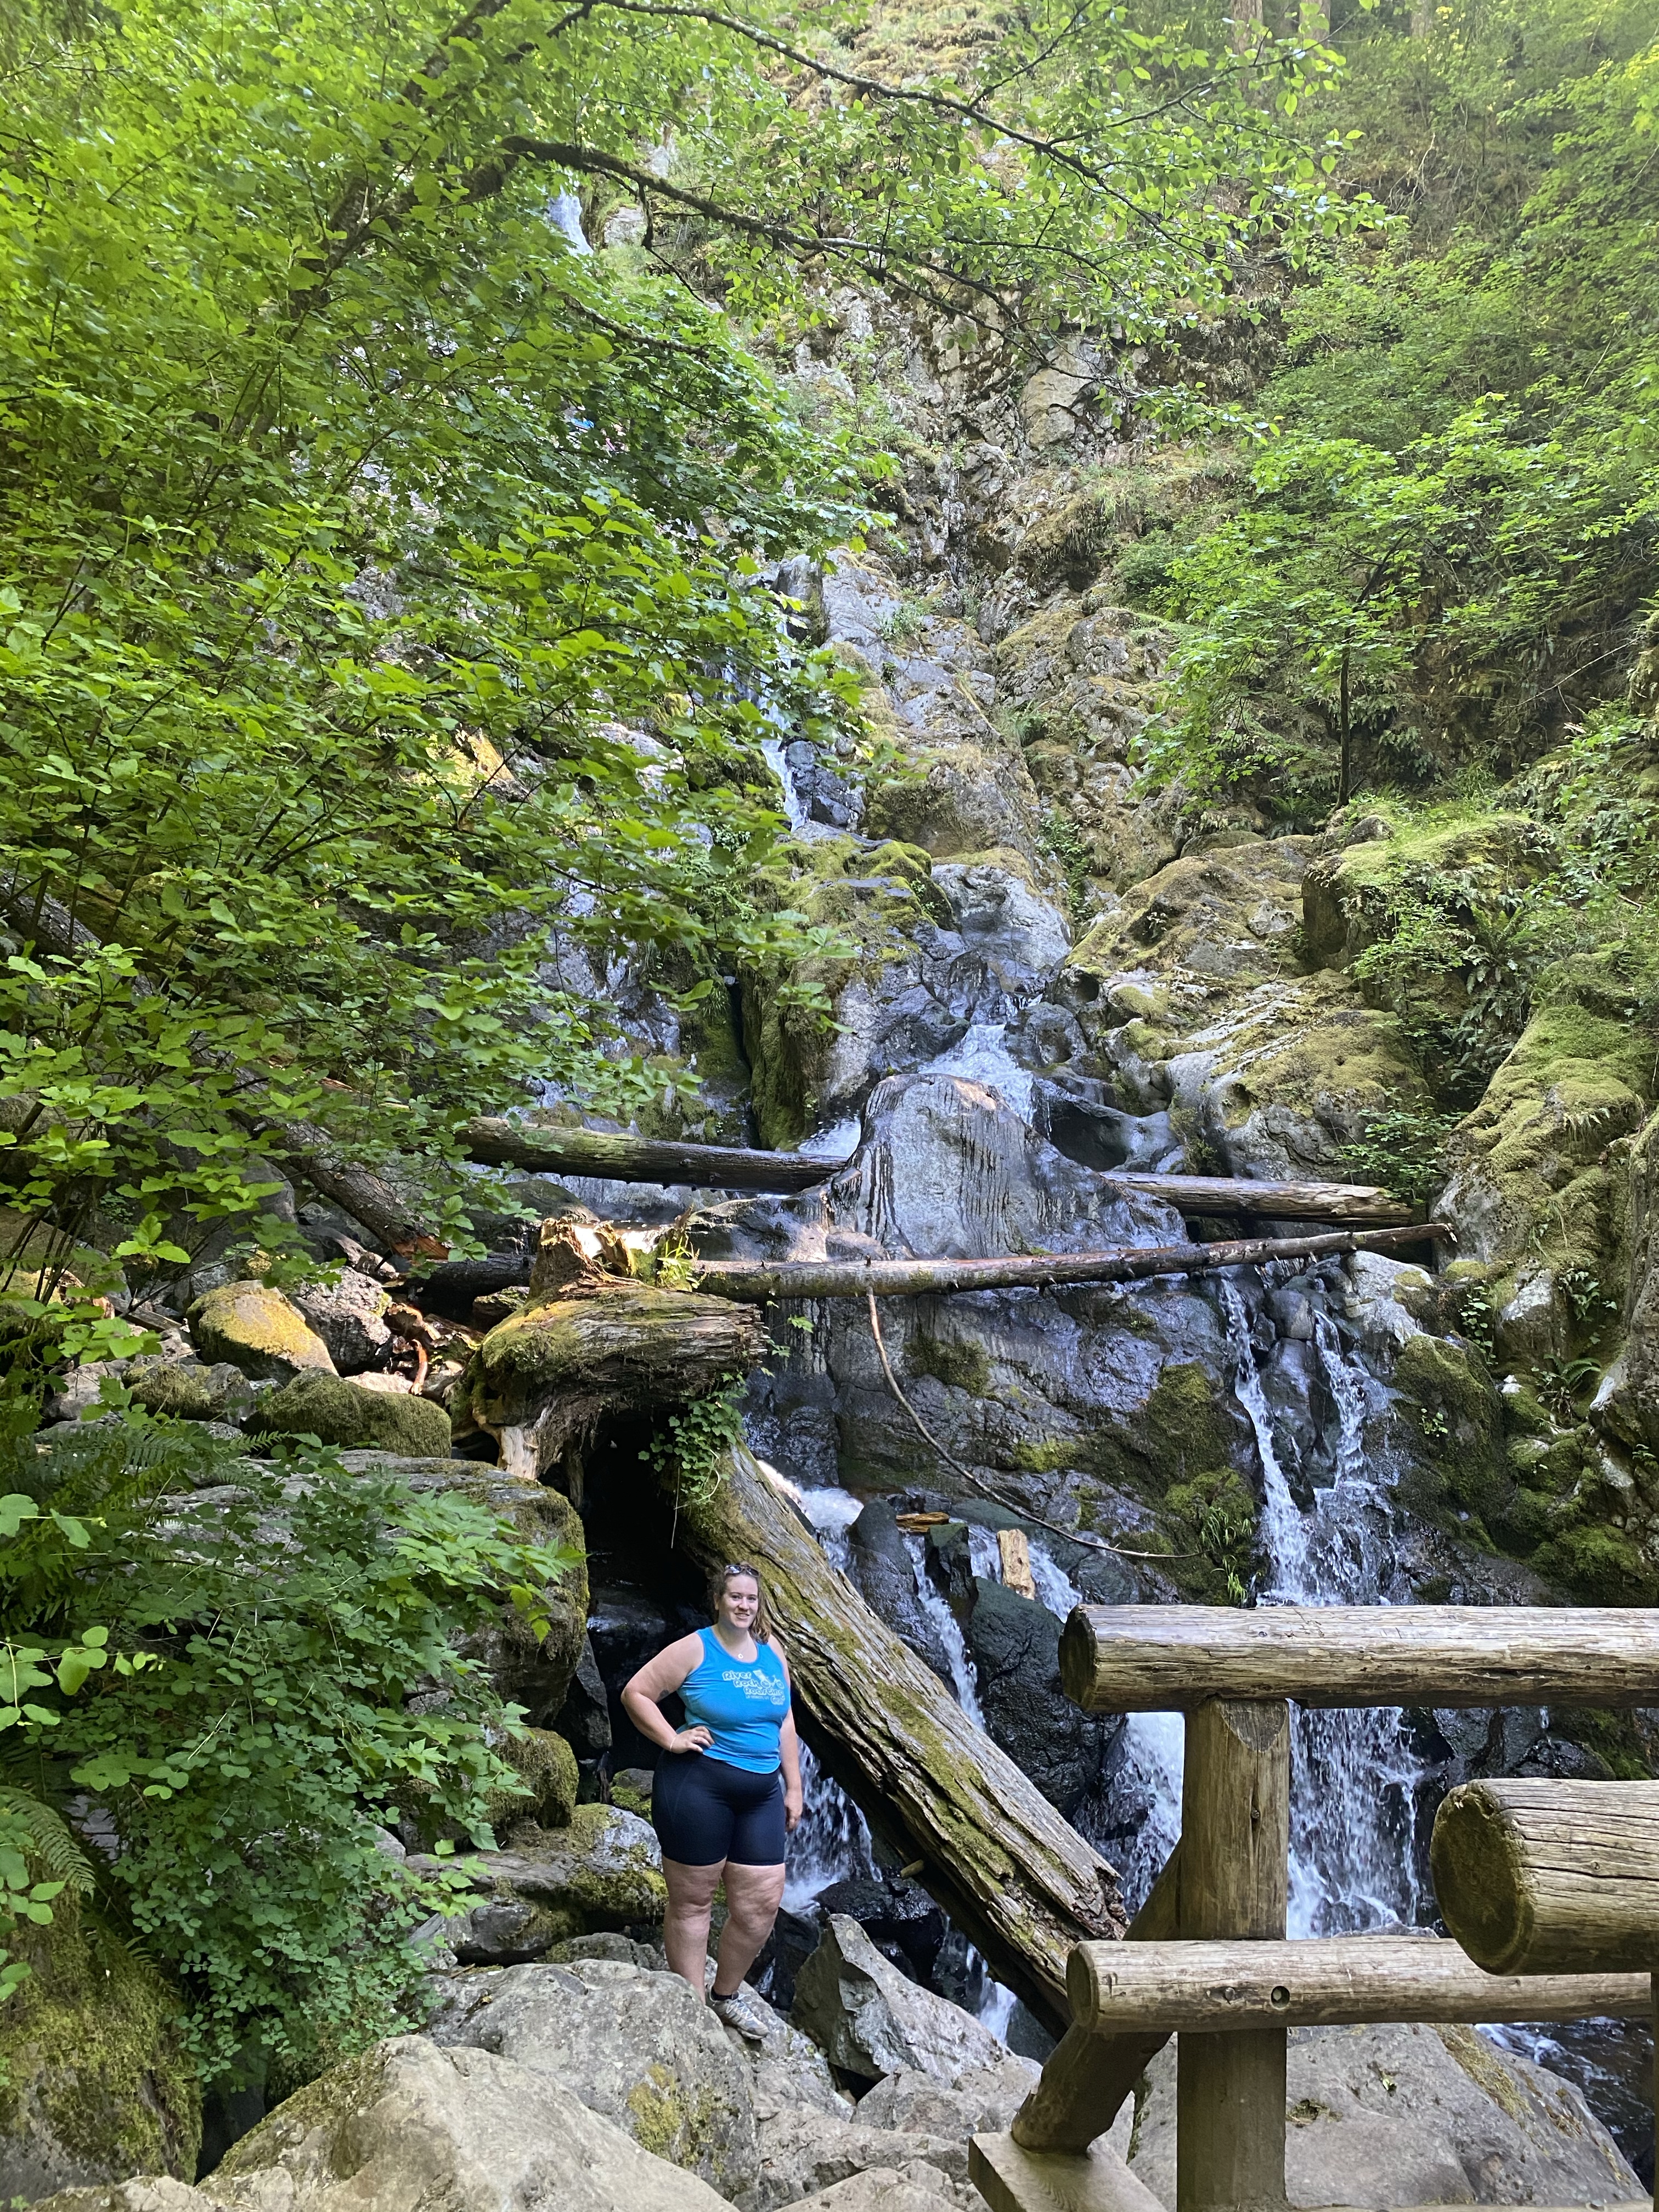
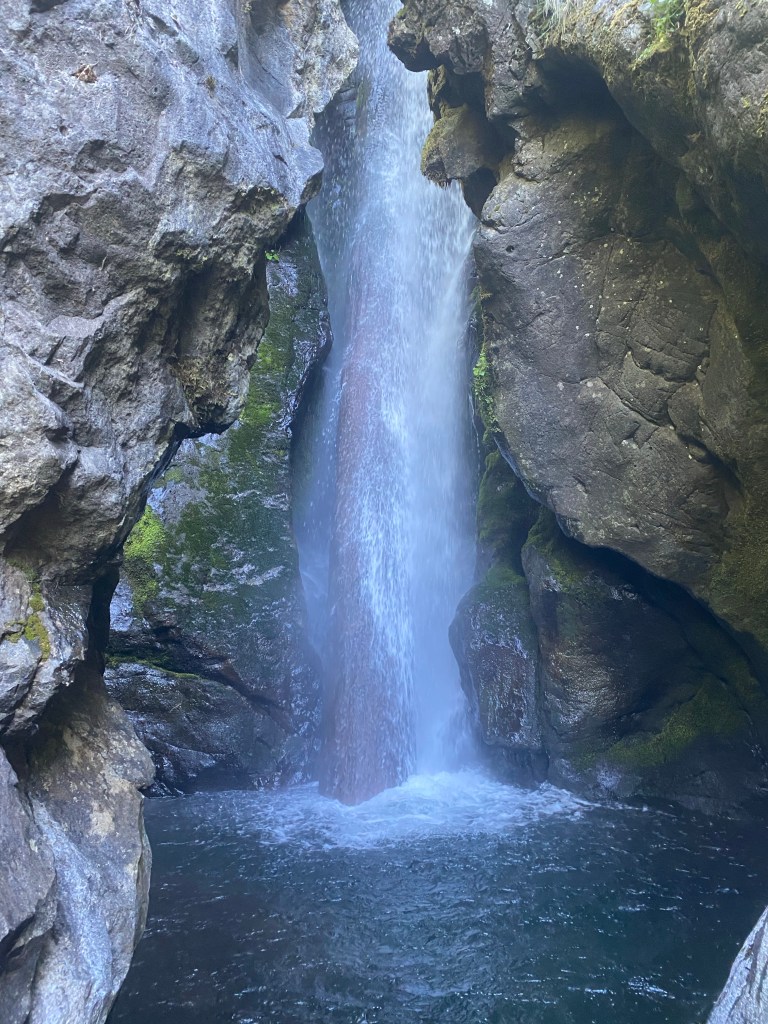
Once you pass the turn off for Hardy Falls, you will encounter a few more bridges but the rest is not far up ahead! Turn left to go up to the Pool of the Winds, or right to start your way down to Rodney Falls. The Pool of the Winds has some railing along the edges, make sure you go all the way to the end to where it looks like you will be able to peak your head into a cave. It is MAGICAL. There is a gorgeous up-close view of the falls and a small pool of water collected around it before it continues its plunge downward. There was also an almost vertical wall of rock you could scale up to another part of the falls. We saw people climbing and I can only assume there was another pool of water at the top. I however did not climb it because I would have killed myself, scaling walls is not my forte.

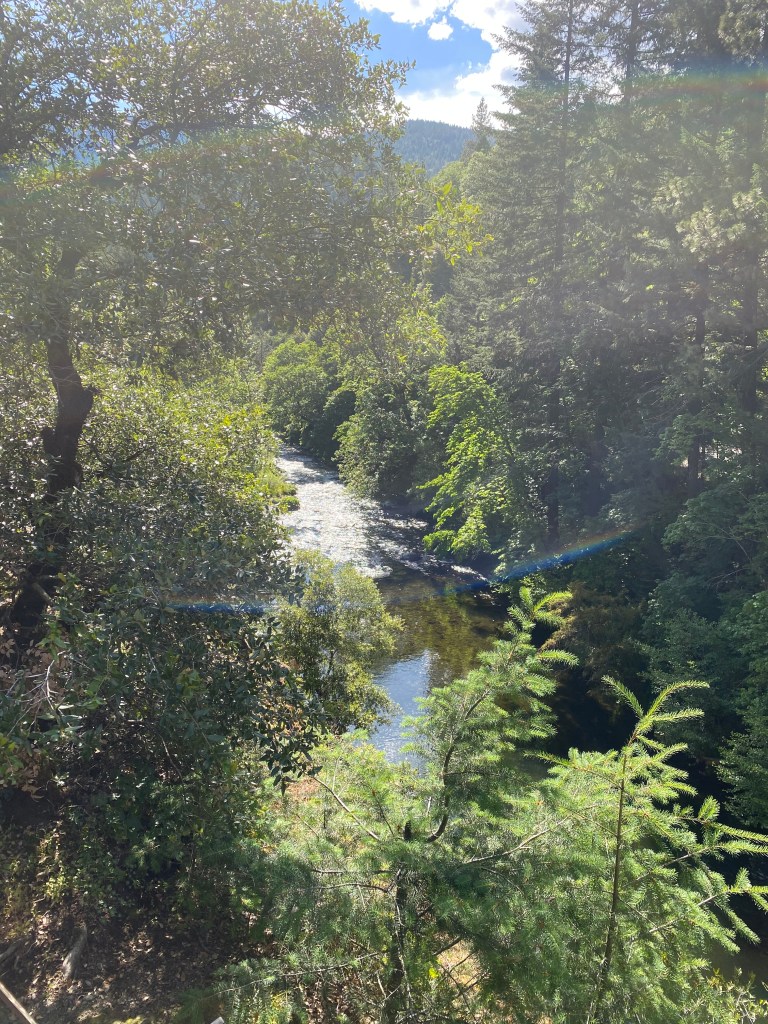
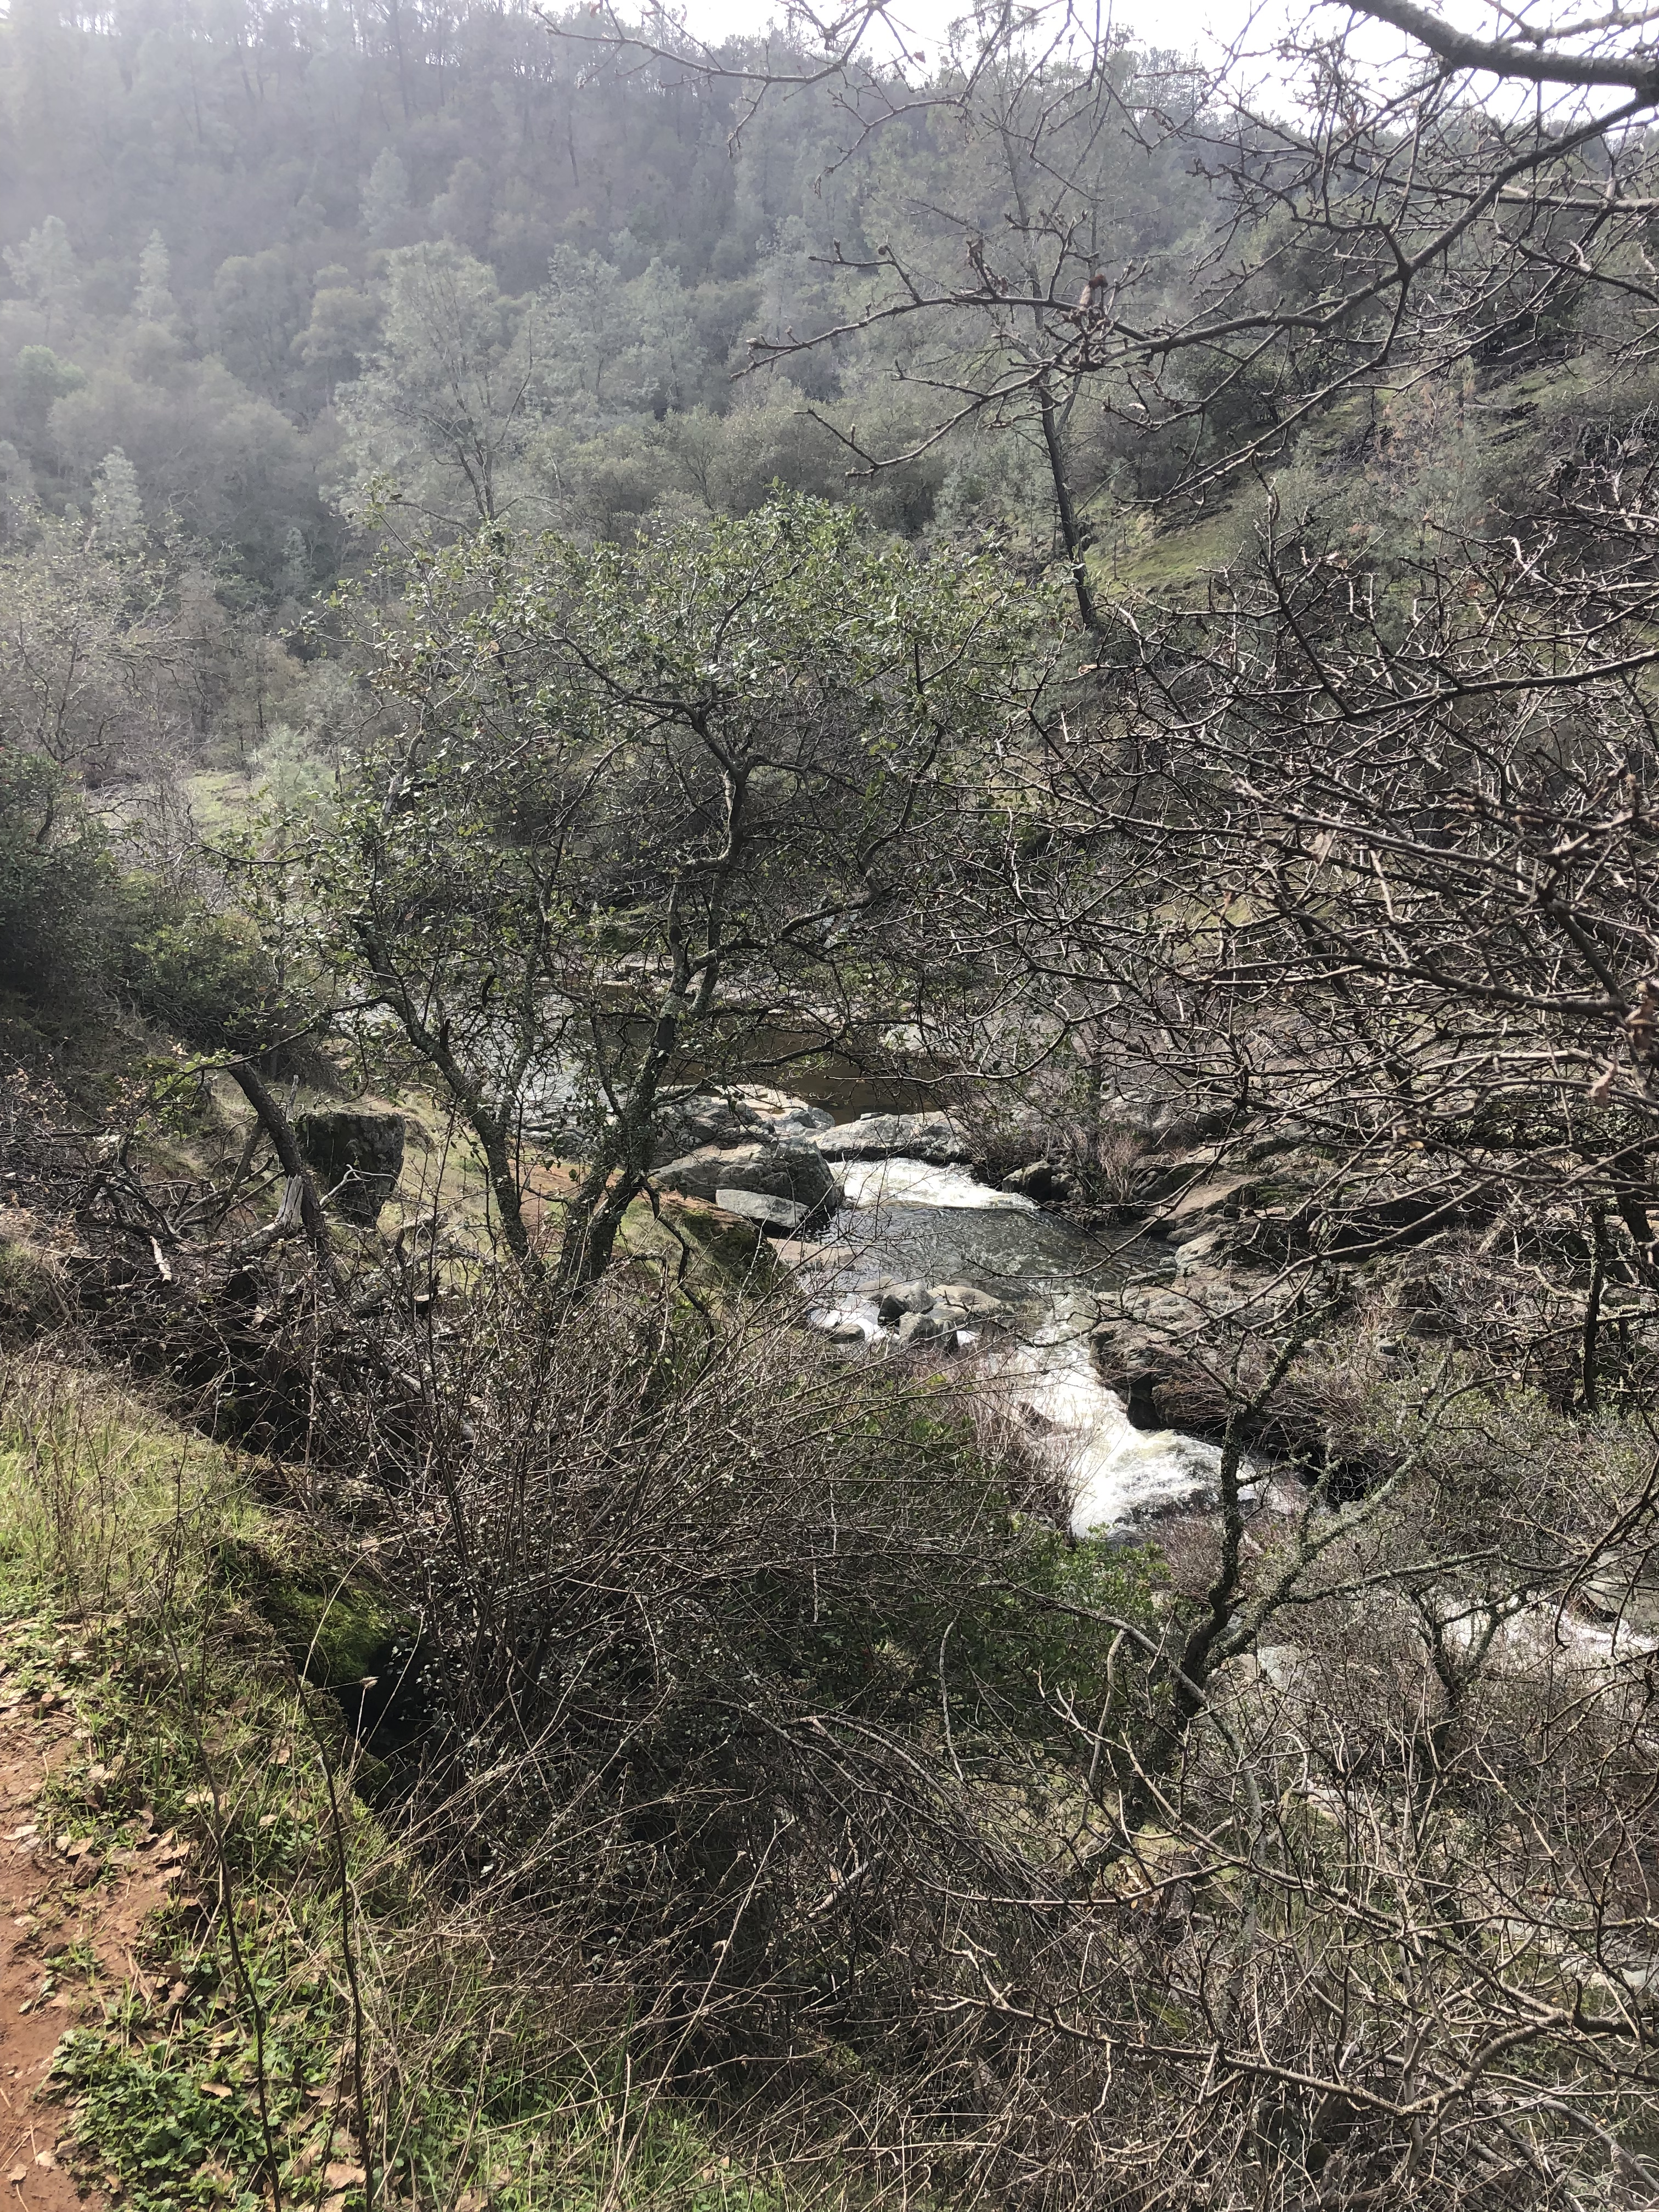
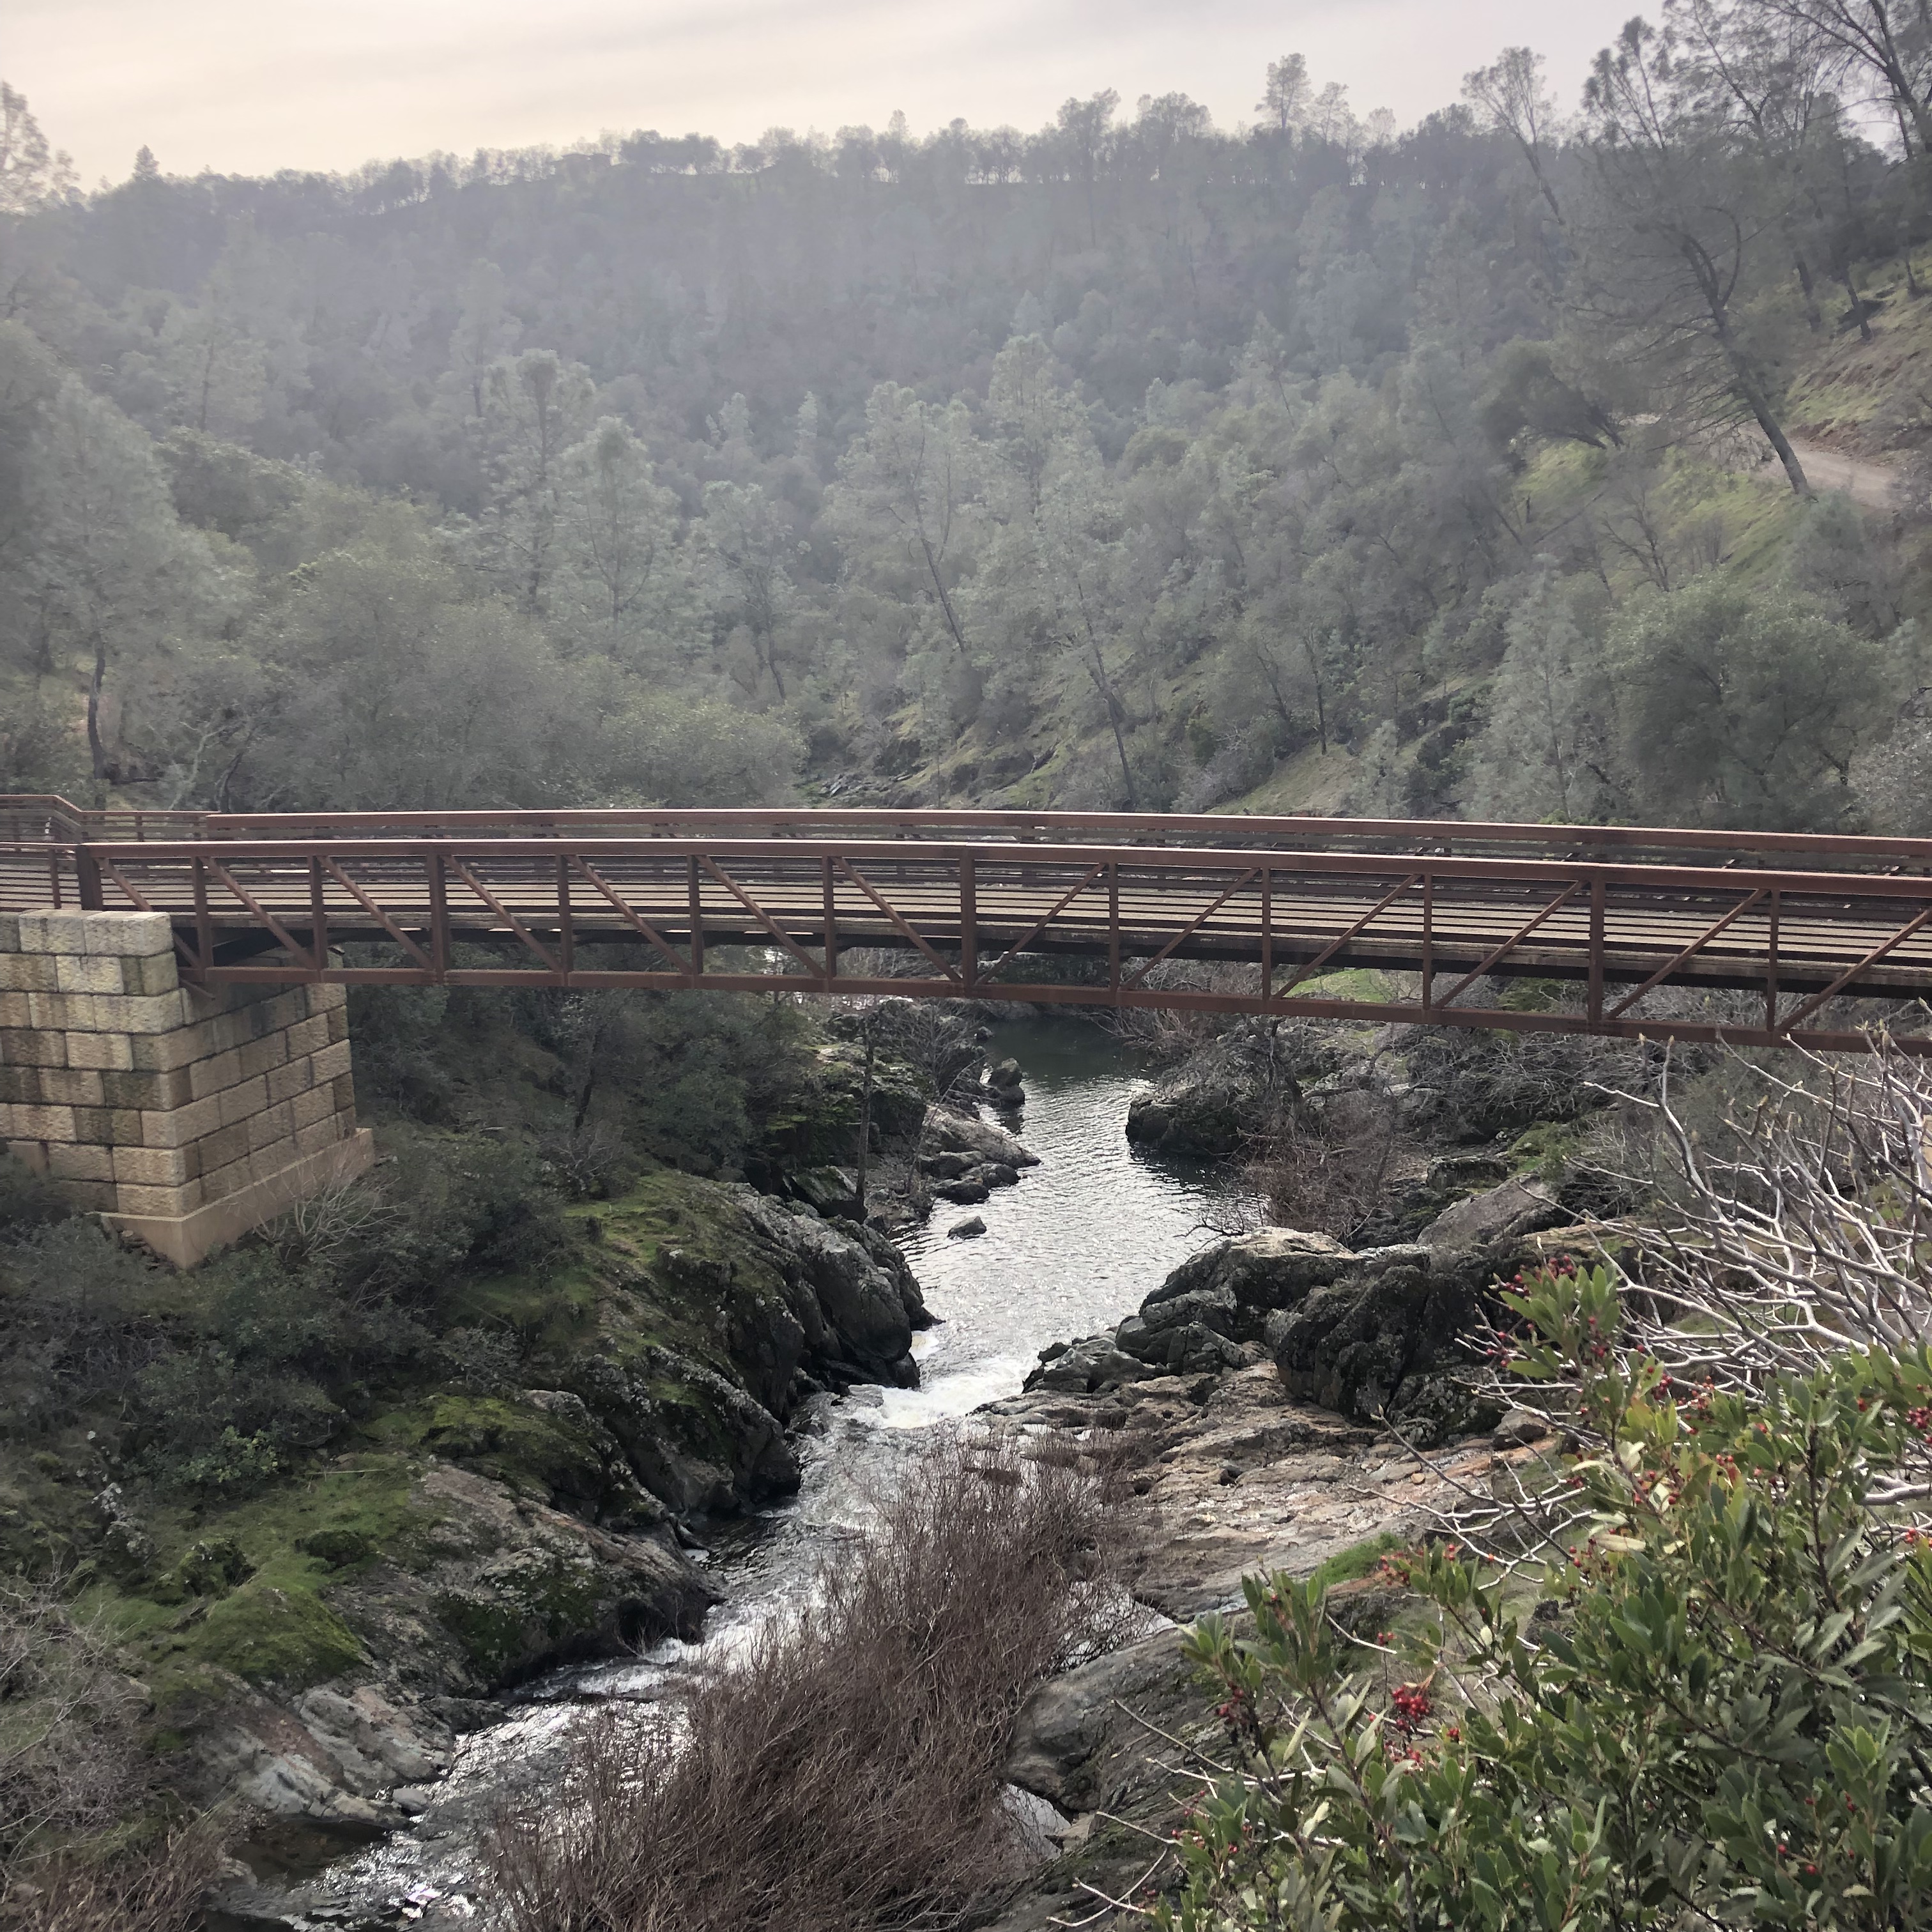
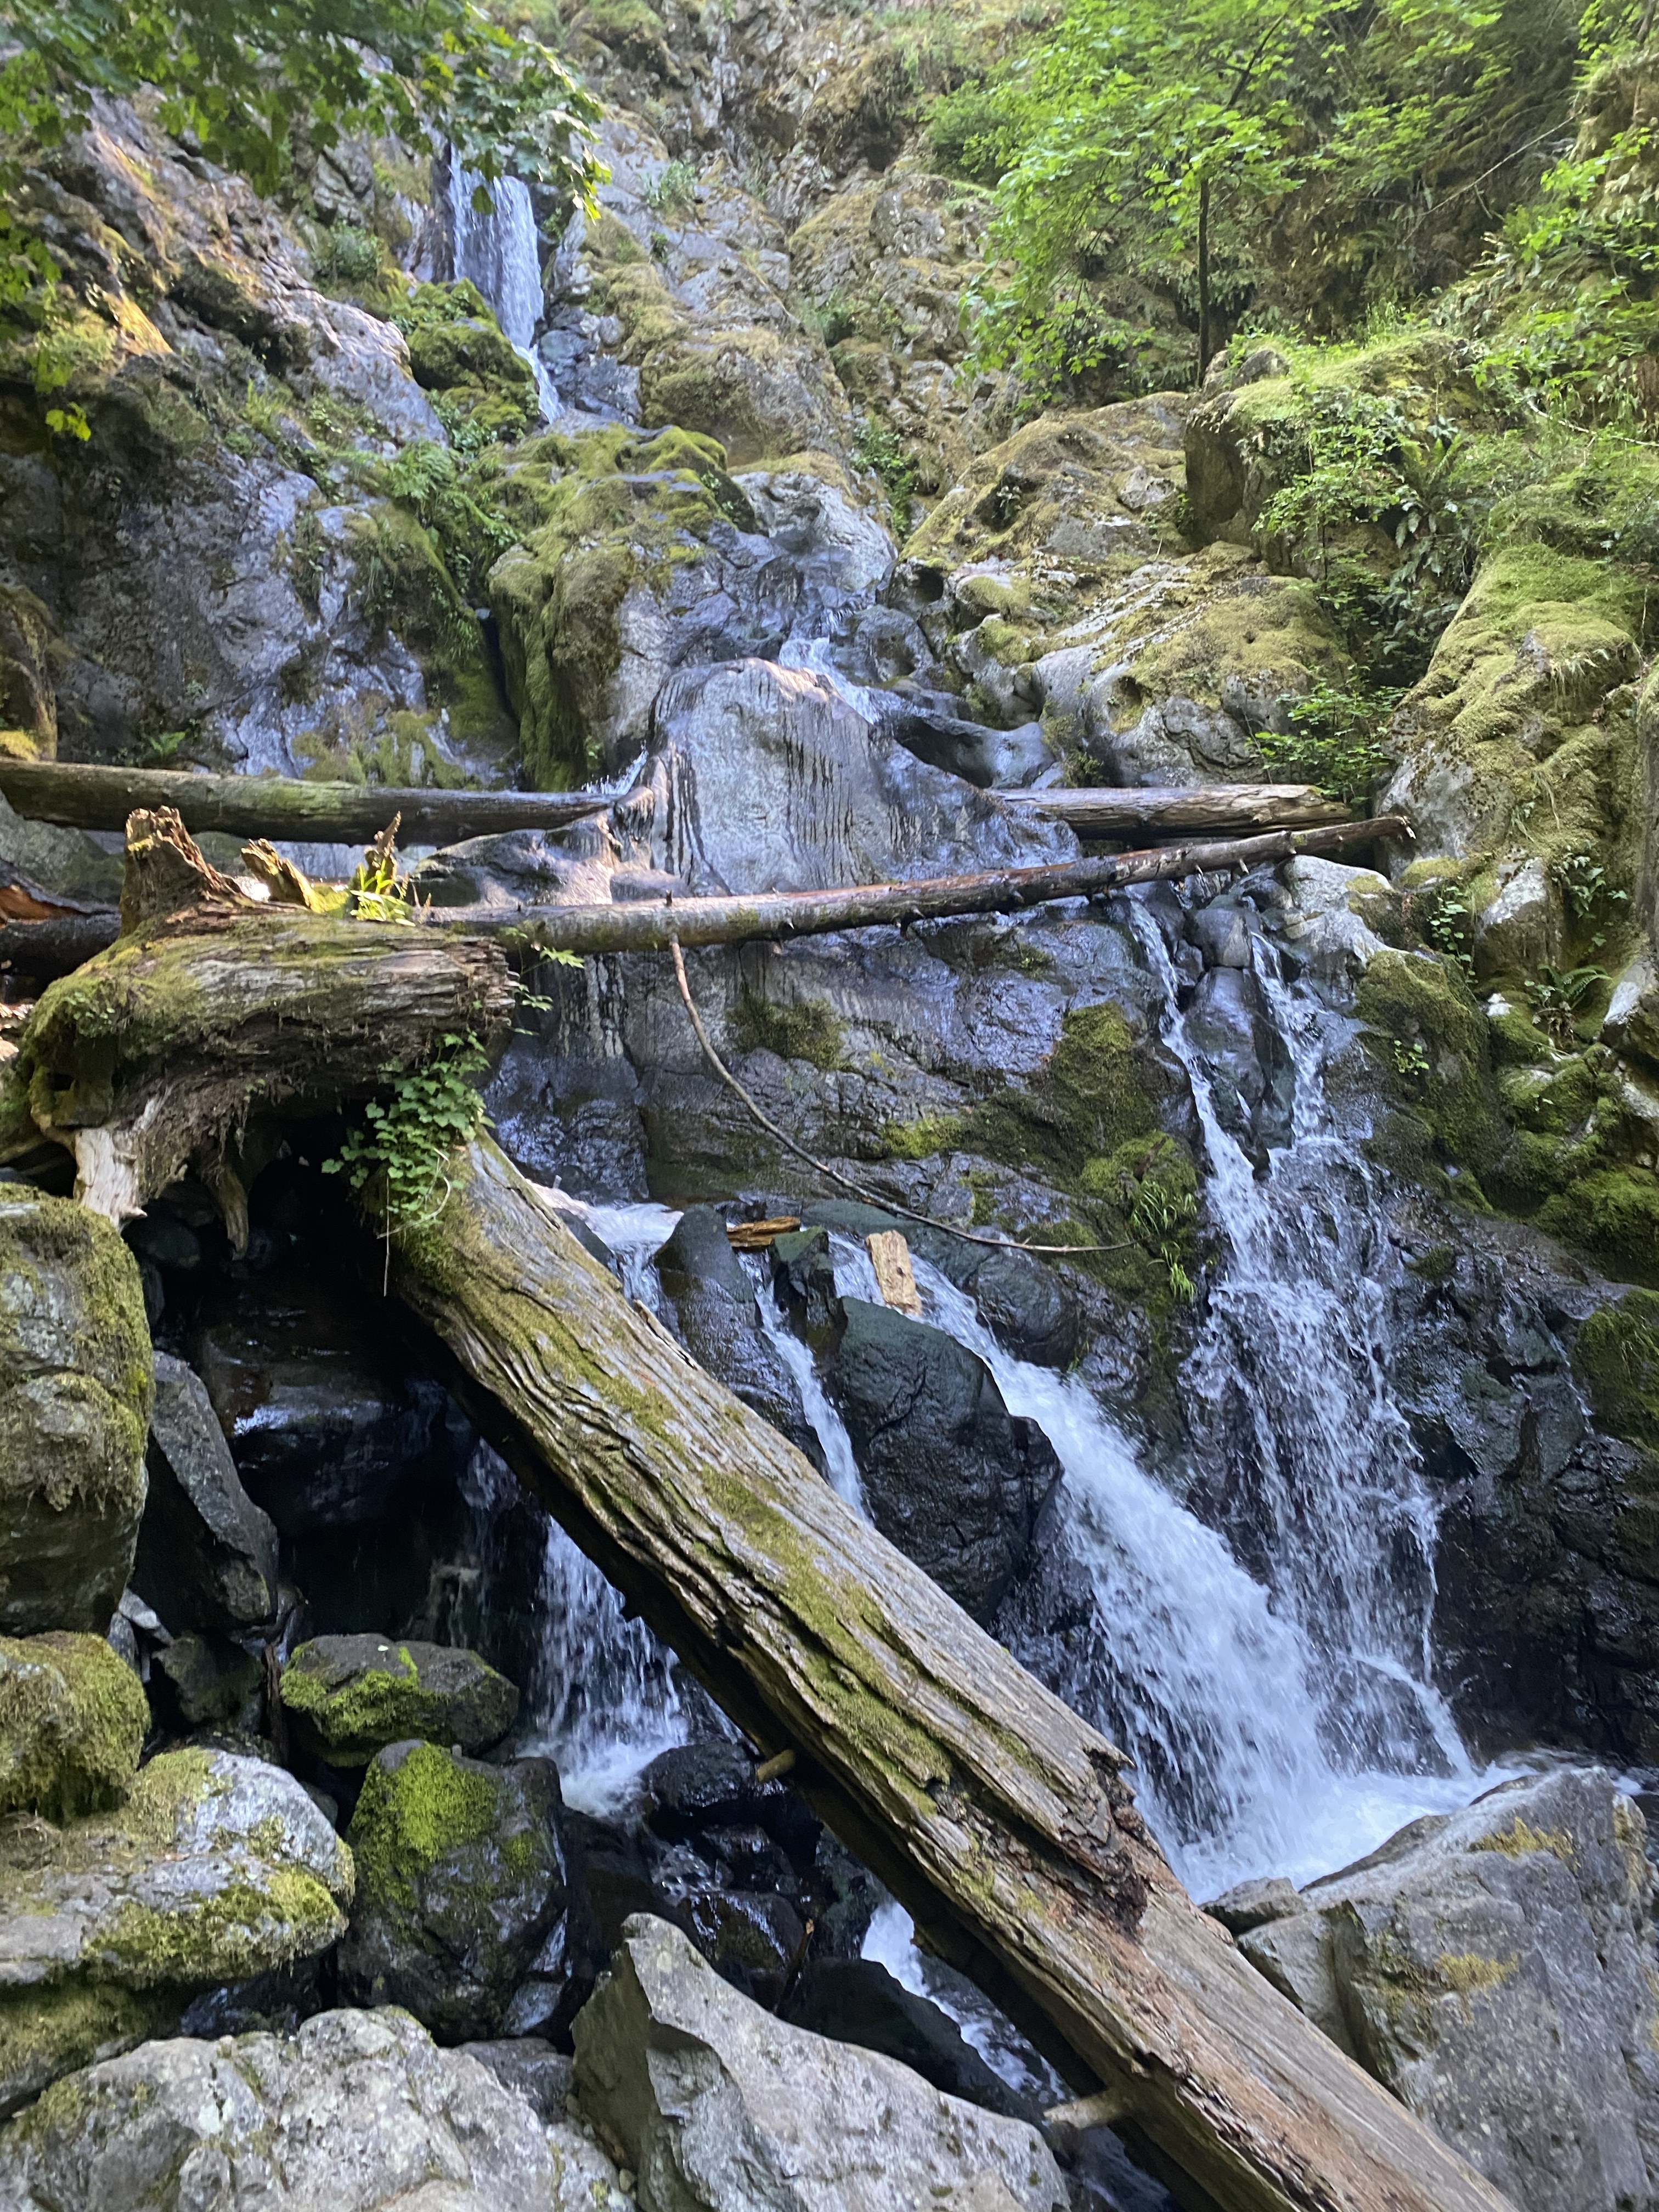
You can see Hardy falls almost immediately as you take the switch back down to it and its beautiful. It was even prettier to me because I had done the Pool of the Winds first and knew what secrets were held at the top. There is a wonderfully long bridge I had fun frolicking across and the Hamilton Mountain Trail continues beyond if you wish to continue. We used this as our turn around point and climbed some of the rocks to get closer to the falls. There are a few different places where you have the opportunity to get closer to the water and we saw several people taking advantage of it.

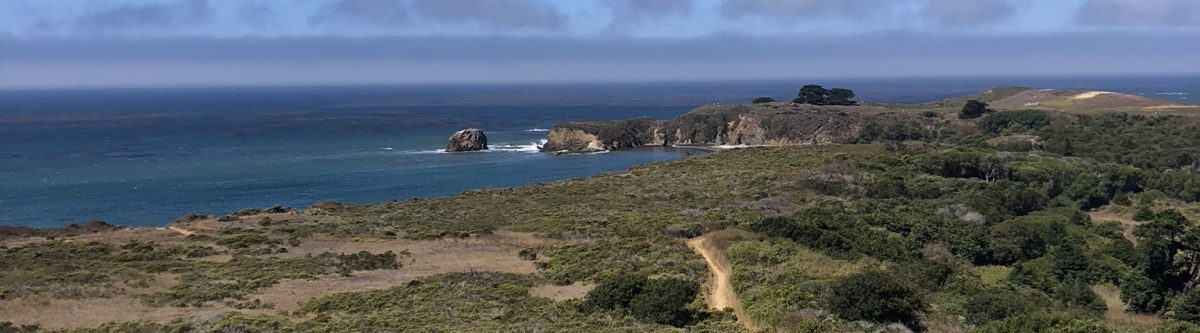
Once we had adequately soaked up the falls we turned around and headed back to the car. We were so glad we had started (kind of) early because there were large groups of people coming in as we were heading out. It was a beautiful and relatively easy trail with lots of shade, next time we are going to bring some snacks and take advantage of the picnic viewpoint of the Gorge!

Until next time, Happy Roaming!

Big Foot Trap

Location: Big Foot Trap (Collings Mtn. Trail), Rogue River-Siskiyou National Forest

Difficulty: Easy

Distance: < 3/4s of a mile. If you can get a spot at the trailhead it is only about half a mile. Otherwise park at the Hart-tish Park parking lot and it will be ¾ of a mile. (see parking).

Elevation: 300 feet.

Cost: $5 for day use at Hart-tish Park parking lot. I got away with parking at the trail head for free but I would recommend bringing the cash.

Parking: There are roughly two spots on the side of the road for this trailhead. Otherwise parking is available across the road at Hart-tish Park (see cost for fees).

Directions: I-5 exit 30. Hwy 62 turns into Hwy 238 and follow 13.5 miles. At the town of turn left onto Applegate Rd. At 15.5 miles you can turn left into Hart-tish Park or the trailhead will be a few more feet up on the right hand side.

Preparation:

  • Sunscreen. It is pretty covered with tree’s, but sunscreen is always a good idea.
  • Water. No water at trailhead. May be some available at the park but I didn’t use it. Always better to come over prepared than under.  
  • Bathroom. There is a rest stop with a pit toilet roughly half a mile before the trailhead or one available if you pay to park at Hart-tish day use area.  

Experience:

The trail is pretty much off by itself in the forest. There is a good trail head sign visible from the road (see picture above) that has a foot print telling you that you are in the right place. You start by cresting a tiny flat mound between the road and the trail, then it quickly shifts downhill hiding you immediately from the view of the road. After only a hundred feet or so the trail splits between hiker and horse access. You will cross through a wooden barricade and start a semi steep descent. Less than five minutes into the trail you cross an incredibly unique footbridge that crosses a creek. When I went (early summer) there was no water, but I would assume in the wetter seasons this footbridge would be helpful to keep you dry.  Shortly after at about a quarter mile there is a wooden bridge.

On my first pass to park at the trailhead there were forestry services parked and I assume doing trail maintenance. The trail was extremely clear the whole time. I am also assuming/hoping the several arrows hand drawn into the dirt were communication between a trail maintenance crew. Otherwise it was extremely eerie to be down this trail by yourself not knowing when the last person hiked through, following crude arrows in the dirt…

I did follow them, however, and was rewarded with my prize. Towards the last bit of trail, it forked into what felt like two very defined trails. I almost went down the wrong one when I noticed the arrow in the ground pointing to the very left trail option. I followed it and was rewarded with a creepy smiley spray painted on a cut tree that passed over the trail. In retrospect it is not creepy but when you are alone, surrounded by forest, walking towards a big foot trap; Everything seems creepy. Later I saw that the right fork of the trail is a short jaunt to a demolished/decayed minor’s cabin. I will have to explore next time!

Up the hill on the left fork is the trap!  In a nice open space with a giant steel gate is the big foot trap. Thankfully, bigfoot was not there when I got to the clearing. It has been spray painted throughout the years and was remarkably still very sturdy. Although it would be no match for Big foot!

Big Foot History:

The Big Foot trap was first created in 1974 by the North American Wildlife Research Team. Which is no longer an organization. They tried for 6 years to trap Big Foot, baiting the trap with carcasses but all they ever caught was beers. The structure is 10 by 10 feet and made with 2×12 planks, combined with heavy metal straps, and fastened to the ground by telephone poles. In 1980 the door the was bolted open for good. It is now a tourist attraction and maintained by the United States Forest Service.

Full Trail Specs:

The Big Foot Trap is part of the Collings Mtn Trail

The trail continues past the trap and increases elevation rapidly up to the ridgeline before taking you along the western edge of Collings Mountain. It will drop you into Watkins campground. If want to do the whole thing find the additional info below!

Difficulty: Moderate/Hard

Distance: 7 miles one way.

Elevation: 1000 feet.

Extra Trail:

There is an easy flat half mile (one way) trail between the Hart-tish day use parking lot and a rest stop up the road. It runs along the side of the lake and provides great views for little effort. If you get to the rest stop there is also a short walkway that takes you out into the lake and gives a nice view of the dam.

Until next time, Happy Roaming!

Trail Talk: Hedge Creek Falls

Location: Hedge Creek Falls (Dunsmuir, CA)

Difficulty: Easy

Distance: Less than a mile round trip, out and back trail. About a quarter mile to the falls.

Elevation: Roughly 200 feet. (My Suunto watch recorded 150 but other sites listed 200).

Cost: FREE

Parking: There is a long, undefined lot directly across from the park.

Directions: This trail can be reached from either direction on I-5. Take the exit for Siskiyou Ave.

From the north: After the exit pass under the freeway and turn right onto Dunsmuir Ave.

From the south: After taking the exit take two rights.

It will be a quick right onto the small road and the parking is directly on the right. When I went I missed the turn, but was able to adjust quickly using the parking lot of a business (Castle Rock Water) directly past the correct street for a quick U-Turn. Dunsmuir Ave is also named Mott Rd.

Preparation:

  • Sunscreen. It is pretty covered with tree’s, but sunscreen is always a good idea.
  • Water. There is a water fountain at the top.
  • Shoes/Clothes. If you are going when its warmer, I would recommend a sandal/shorts combo so you can enjoy dipping into the pool below the falls. I did the whole trail in flip flops without a problem.
  • Bathroom. There was one porta potty at the top of the parking. I didn’t use it and am not sure what its condition is. I would not recommend counting on this stop to be your bathroom breath.

Experience:

Once parked I head across the street to the little park. There is a small grassy area with a few picnic tables, a gazebo with benches, and a fun water fountain. As I was starting the trail a family was settling in for a picnic lunch. The trail head is directly past the gazebo. The trail for the most part is clear, there is a small stream that appears to be routed under the trail and a few rockslides to step over. There was also a decent amount of poison oak off the trail but again the trail itself was clear. At the first switchback you are able to see the small but mighty falls and after a few more minutes you will already be to its base.

Hedge Creek Falls: For a short clip of me walking behind the falls scroll to the bottom!

The base of the falls is really special. There are a lot of larger rocks surrounding it for a nice area to spread out and enjoy. The water form the falls also pools into a great little shallow swimming hole before continuing along the creek. Be aware the whole area is pretty small and would get crowded quickly. If you are looking for a great place of water to enjoy for an extended period of time this might not be the most enjoyable. My favorite part is that there is a small cave carved out behind the falls and the trail takes you around and behind Hedge Creek Falls. Its such a unique view.

If you continue past the falls there is a bench which will allow you to admire the scene from afar. Continue down the trail that parallels Hatch Creek to a nice sized observation deck. From the deck you get a good view of Mount Shasta and the Sacramento river. She just peeked through the trees and below the clouds for me on this day.

Mount Shasta from Hedge Creek Falls Trail Overlooking Sacramento River

At this point the trail sharply turns back into an additional switch back that will take you down to the banks of the Sacramento river. Along this path is also great views of some mini falls and waterslides from Hedge Creek. At the Sacramento river I had read there was a swimming hole and a good shallow area. The water was a bit high when I went and I wasn’t able to clearly see where this spot would be but I would assume later in the season it would be a great place.

View of the Sacramento River from the end of the trail.

All in all I had a great time. With its short length and easy access from the highway it’s a great spot to stop if you are just passing through. Better than a random rest stop to stretch your legs and refresh before continuing through the mountains. I used it as just that on a long road trip starting in Monterey, CA and ending for the night in Medford, OR.

Happy Roaming!

Walking behind Hedge Creek Falls

Trail Talk: Hidden Falls Regional Park – South Legacy way to Hidden Falls Access Trail

Location: Hidden Falls Regional Park

Difficulty: Easy-Moderate

Distance: 2.5-3 miles. I didn’t record on my Fitbit, but this is our best guess from the trail descriptions and online creeping for help. 

Time for us to Complete: 1.5 hours

Cost: $8 for parking. If you are going on the weekend or a holiday you must reserve your space online before you go. Thisis nice because you have a guaranteed spot when you get there. 

Parking: Single Parking lot. 

Directions: There is only one entrance so just follow the signs. It’s located at 7587 Mears Place, Auburn, CA and located between the communities of Auburn and Lincoln. 

Preparation:

 Sunscreen
 Water – There is no water fill-up in the park, you must bring in water you wish to consume. 

Heat Index:  This Park is located near Sacramento Valley . We were lucky enough to be in the area in January so it was sixty degrees and overcast. However, in the summer this area will get 90+. 

The Journey

To get to hidden falls you will connect the South Legacy Waytrail to the Hidden Falls Trail. The South Legacy Way trail is classified as easy. You’ll take this until you cross a bridge and then take the first left. Here the Hidden Falls Trail starts, and this portion is classified as moderate. Both paths seemed to have the same amount of elevation gain/decline, the only big difference we noticed is that the “easy” classified trails were wide with gravel and the “moderate” classified trails were narrow with dirt. This is a very design your own path trail system, as there are several other trials you can start or take and still end up at the destination of the waterfalls. I got to take my mom with me on this hike and we had a blast. I wish we could have stayed and explored more but were in a time crunch to get back to town for fundraiser event for the PCT association! 

The Falls

I love waterfalls. If its water and it falls I am the happiest person in the world so any recollections here may be biased. The Hidden Falls trail follows along the river and eventually twists you back to an observation deck for the falls. They are beautiful. The falls are fed by the western Sierra Nevada range and when we went the river was flowing! It was a great spot to stop and enjoy. If you are more adventurous you can climb down to the river as well and there are places to swim when it gets warm.

The Baby Falls

If you can’t get enough of falling water climb up back to the trail and finish it out until it connects to the North Legacy Waytrail. From there cross the large bridge and you will see stairs to another observation deck that overlooks Canyon View falls. These ones are little compared to the main event at Hidden Falls but worth the extra trek as the view from the bridge is delightful. 

The Park

The park is great, well organized, and clean. They have portable bathrooms strategically located throughout the park which is always nice. They have a good variety of trails from easy to difficult and good varied lengths that you can combine for any size length you wish to achieve. Their site claims 30 miles of multiple use trails and they have great placards throughout the park providing informative information about the surrounding area. It also looks like this is also a great place for horse back riding and mountain biking as we saw several of both while we were out there and I heard a few mountain bikers raving about the trail quality One of my favorite parts is that they limit visitors to the park to only the number of vehicles that can fit into the parking lot, and those who purchase a parking lot space have that space reserved all day.  I can’t wait to go back.


Until next time, Happy Roaming!

Learning to Roam

Hi my name is Hannah Brotherton and this is my story; My past, present, future, and dreams. To see how far I’ve come and how I’m going to get where I’m going, it’s best to start at the beginning. Enjoy!

To Roam: To go from place to place without purpose or direction. To travel purposefully unhindered through a wide area.

90594579-0653-4312-A269-2B7BE18C8A45

For the better part of ten years I pushed myself relentlessly on the corporate path. The correct path. Working hard through high school, through college, and landing my first career. Then I pushed myself in my career, climbing the ladder swiftly to become one of the youngest managers in my area. Then…I got stuck. Things weren’t going my way at work, I wasn’t feeling motivated, I was constantly depressed and nothing seemed to being moving forward. What was the point? I could see the levels I could advance to if I pushed myself harder, but I wasn’t happy, and dreaming about those next stages in my career wasn’t making me happier.

Finally as I neared the end of a particularly bad work week I got this unimaginable urge to take off. To where? I had no idea. I didn’t have a lot of money left in my account but I had a full tank of gas and two days off, I would figure it out. I threw an overnight bag in my car, turned off my phone, put a new CD on the radio (yes I’m still old school, I love a good CD) and just started driving north. The rest of that story is a great topic for another time but the point is that drive cleared my head. All 19 hours of it. It was my first REAL solo adventure. It was the first time I went somewhere with a direction but not necessarily a plan, and I felt free. When I returned from that trip I was happy and I was refreshed, and I was desperate to figure out a way to hang on to that feeling.

As I started dreaming of an adventure life I realized another seriously important fact about myself. I still loved the corporate life as well. I love managing my office, I love working with accounts, and I loved mentoring my employees. I also couldn’t see myself ever giving up the other perks: the steady paycheck, the GREAT healthcare, and my 401k. I’m still not ready to toss those aside just to go racing off on an adventure. I know a lot of people do drop everything for an adventure and are able to find happiness in just that, and maybe one day I will to. Until then, this blog is about how I balance both. How I organize my free time, plan my adventures, and prioritize everything that is important to me. How I fulfill my needs to be in a corporate environment and explore. How I ROAM.2EF0D5A8-D19E-4A83-8562-F6B827C199F3